Oh crap, I just killed my screen session.

I have a huge archive of photos. I shoot tens of thousands of photos every year. Storage requirements for all those photos was bad enough when I shot in Jpeg but then I switched to RAW and space usage jumped! Here’s what the last 3 years looks like:
169GB of data is a lot of stuff to store. Originally I had them all duplicated on two external drives but then I bought a 500GB internal drive for my laptop for speedier access. Unfortunately that drive simply wasn’t big enough. I need to convert some of my RAW files to Jpeg to save space. To preserve the original RAW files I want to archive them somewhere permanently. I have a DVD writer so that was an obvious choice.
Burning data to lots of DVDs is tiresome. You can use tar, zip or another archiver to split the data but then you have to run through all the DVDs to pick out a file to restore. I like having the files directly accessible but that means endless selecting files, making sure they’re as close to the DVD size as possible, burning them, moving on to the next bunch. In the bad old DOS days I had a program to fill floppy disks if you pointed it at a directory but I’ve spent years searching for a similar Linux script. Last week I found one.
Enter Discspan. My 2007 archive was already burned to DVD, and I wish I had this script while doing it. I’ve burned my 2008 archive with Discspan and it was a doddle. Point it at the right directory, feed it some details about the DVD drive and let it go. 26 DVDs later and my 2008 archive is safe on DVD!
The script scans the directory, figures out how many DVDs are required and it fills each DVD with data, spanning my digital archive over multiple DVDs.
Be aware when using it that you should let Linux detect the next blank DVD before pressing return. The first time I ran it the script bombed out when growisofs didn’t see media to write to. You also need to patch it because it doesn’t detect the right size of DVD+R’s but it’s a simple one-liner.
Another Linux project, Brasero promises to span disks too but it didn’t for me. It’s the default CD/DVD burner in Ubuntu now and it’s a shame this functionality is broken in it.
Hopefully Brasero will be fixed for the next release. I’d offer to help but my C/C++ is very rusty.
If you host your own WordPress blog, it’s probably on Apache. That all fine and good. For most sites Apache works wonderfully, especially as it’s so easy to find information on it, on mod_rewrite and everything else that everyone else uses.
One of the alternatives is Nginx, a really fast webserver that streaks ahead of Apache in terms of performance, but isn’t quite as easy to use. That’s partly because Apache is the default webserver on most Linux distributions and hosts. Want to try Nginx? Here’s how.
Install Nginx. On Debian based systems that’s as easy as
aptitude install nginx
Nginx doesn’t talk PHP out of the box but one way to do it is via spawn-fcgi. Here’s where it gets complicated. (Docs summarised from here)
aptitude install php5-cgi
location ~ \.php$ {
        include /etc/nginx/fastcgi_params;
        fastcgi_pass  127.0.0.1:9000;
        fastcgi_index index.php;
        fastcgi_param  SCRIPT_FILENAME  /var/www/nginx-default$fastcgi_script_name;
}
apt-get install lighttpd
You’ll probably get an error at the end of the install if Apache is already running on port 80. Edit /etc/lighttpd/lighttpd.conf and uncomment the line
server.port = 80
and change 80 to 81. Now run the apt-get command again and it will install.
/etc/init.d/lighttpd stop
will stop lighttpd running. (You don’t need it)
#!/bin/sh
/usr/bin/spawn-fcgi -a 127.0.0.1 -p 9000 -u nobody -f /usr/bin/php5-cgi
The user “nobody” should match the user Apache runs as to make things easier to transition.
Make it executable with
chmod 755 /usr/bin/php-fastcgi
#!/bin/bash
PHP_SCRIPT=/usr/bin/php-fastcgi
RETVAL=0
case "$1" in
    start)
      $PHP_SCRIPT
      RETVAL=$?
  ;;
    stop)
      killall -9 php
      RETVAL=$?
  ;;
    restart)
      killall -9 php
      $PHP_SCRIPT
      RETVAL=$?
  ;;
    *)
      echo "Usage: php-fastcgi {start|stop|restart}"
      exit 1
  ;;
esac
exit $RETVAL
/etc/init.d/init-fastcgi start
and make sure it starts on every reboot with
update-rc.d init-fastcgi defaults
That’s the PHP part of things. In Debian, the default root is “/var/www/nginx-default” so put an index.php in there to test things out. Stop Apache and start Nginx (if this is a test server only!) and visit your site. Works? Now to get WordPress and WP Super Cache working.
Open up /etc/nginx/sites-enabled/default in your editor and comment out the text already there with # characters. Paste the following in. Change paths and domains to suit your site. (via)
server {
        server_name  example.com www.example.com;
        listen   80;
        error_log   /www/logs/example.com-error.log;
        access_log  /www/logs/example.com-access.log;

        location ~ \.php$ {
                include /etc/nginx/fastcgi_params;
                fastcgi_pass  127.0.0.1:9000;
                fastcgi_index index.php;
                fastcgi_param  SCRIPT_FILENAME  /www/example.com/htdocs$fastcgi_script_name;
        }

        location / {
               gzip  on;
               gzip_http_version 1.0;

               gzip_vary on;

               gzip_comp_level 3;

               gzip_proxied any;

               gzip_types text/plain text/html text/css application/json application/x-javascript text/xml application/xml application/xml+rss text/javascript;

               gzip_buffers 16 8k;
               root   /www/example.com/htdocs;
               index  index.php index.html index.htm;
# if the requested file exists, return it immediately
               if (-f $request_filename) {
                       break;
               }

               set $supercache_file '';
               set $supercache_uri $request_uri;

               if ($request_method = POST) {
                       set $supercache_uri '';
               }

# Using pretty permalinks, so bypass the cache for any query string
               if ($query_string) {
                       set $supercache_uri '';
               }

               if ($http_cookie ~* "comment_author_|wordpress|wp-postpass_" ) {
                       set $supercache_uri '';
               }

# if we haven't bypassed the cache, specify our supercache file
               if ($supercache_uri ~ ^(.+)$) {
                       set $supercache_file /wp-content/cache/supercache/$http_host/$1index.html;
               }

# only rewrite to the supercache file if it actually exists
               if (-f $document_root$supercache_file) {
                       rewrite ^(.*)$ $supercache_file break;
               }

# all other requests go to WordPress
               if (!-e $request_filename) {
                       rewrite . /index.php last;
               }
        }
}
I think the gzip settings above will compress cached files if necessary but Nginx can use the already gzipped Supercache files. The version of Debian I use doesn’t have gzip support compiled in, but if your system does, take a look at the gzip_static directive. Thanks sivel.
Finally, edit /etc/nginx/nginx.conf and make sure the user in the following line matches the user above:
user www-data;
I changed it to “nobody nogroup”.
Now, stop Apache and start Nginx:
/etc/init.d/apache stop; /etc/init.d/nginx start
WP Super Cache will complain about mod_rewrite missing, and you should disable mobile support.
How has it worked out? I only switched on Friday. The server did do more traffic than normal, but I put that down to the floods in Cork. Weekend traffic was perfectly normal.
Load on the site is slightly higher, probably because my anti-bot mod_rewrite rules aren’t working now. Pingdom stats for the site haven’t changed drastically and I think the Minify plugin stopped working, must debug that this week. Switching web servers is a huge task. I disabled mobile support in Supercache because I need to translate those rules to Nginx ones. A little birdie told me that he’s going to be writing a blog post on this very subject soon. Here’s hoping he’ll put fingers to keys soon.
Have you switched to Nginx? How has your switch worked out for you?
Every time I come to recreate the Postfix database file when I edit the file /etc/postfix/virtual.cf I forget what command I need to recreate virtual.cf.db
Hopefully I’ll check my blog next time. The command is postmap. Hope this is useful for someone else too!
postmap /etc/postfix/virtual.cf
/etc/init.d/postfix restart
ubuntu.com is down unfortunately. The release of Ubuntu 9.10, Karmic Koala the latest version of Ubuntu Linux, is obviously driving a heck of a lot of traffic to the site. (I wonder if they use the equivalent of wp-super-cache?)
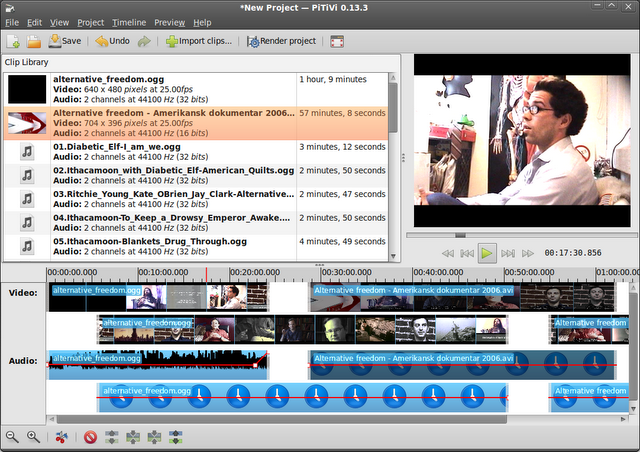
Anyway, I’ll be upgrading tomorrow probably and once I do I’ll be checking out some of the applications mentioned on this page. Everything from an alternative media player, the (as yet unreleased) Gnome 3.0, audio/video editing, a photo manager to the pretty sweet Electric Sheep screensaver are listed here.
Many of the apps are available for Ubuntu 9.04 but others require building manually. I’ll be busy over the weekend 🙂
Here’s a few of the eye catching screenshots from that page, just to whet your appetite!


At the recent Automattic meetup in Quebec Matt gave a passionate talk about how great the Dvorak keyboard layout was and handed out paper copies of The Dvorak Zine.
The meetup was hectic and the first chance I had to try it out was on the plane home. Just over 5 hours from Montreal to Heathrow, London. Here’s what I typed in about 2 hours:
Mad! Typing this on the flight back to London using the dvorak keyboard layout. It’s slow going but I have plenty of time to practice, it’s a long flight! My finger memory says QWERTY but they’re very slowly mapping to the new layout. Vowels come first followed by s, m, l, n and d.
It’s definitely a better layout but right now I am so slow! I’m glad that I have power on this flight. No need for the extra battery! I love how th are next to each other.
Gotta get me a layout I can stick to the keys of the macbook.
Watched the Hurt Locker while typing this.I always type i instead of d.
Gonna watch Night at the museum 2 again, just so I can watch the ending, finally.
I’ve got three seats to myself. Maybe I should sleep? Seems that would be the most sensible thing to do, now wouldn’t it? Looks like we’re about half way across the Atlantic! The film is fast forwarding nice and fast!
Time for a break from Dvorak!
Wow! Layer Cake is a great film! A bit violent but good ending! Only 156 miles to go! Then at least an hour in Heathrow! Can’t believe I didn’t Sleep!
Yes, I didn’t sleep. That was a long day, and Layer Cake was on my laptop (freshly ripped from the DVD I bought before leaving). I can heartily recommend Air Canada. Best experience I’ve had in economy on a trans-Atlantic flight.
Anyway, changing the Mac OS X keyboard to the Dvorak layout is easy, as it is in Linux too. Trying to login using the Dvorak layout is a right pain though.
I didn’t try to rip out the keys of my Macbook but I did rearrange the keys on a wireless keyboard. It actually didn’t help, mainly because the keyboard itself isn’t that comfortable.

The next step was to run through a few Dvorak keyboard training tutorials. They went well and I repeated the first tutorial several times, improving the times and accuracy each time. I’m not doing quite as well as Nick is doing though. I’m impressed.
I’ll persevere. My hands are retraining themselves. The Dvorak Zine is a great help, but if I tried using Dvorak for work I’d be 90% less productive right now. Matt, that ok then? 😉
If you’re using the latest version of Ubuntu, Jaunty Jackalope, or version 9.04 and you use a laptop with an Intel graphics chip like I do in my Dell D630 you may have gotten used to to the God awful video performance since you upgraded from the previous release.
I had. I had forgotten that windows aren’t supposed to tear when you drag them, and that yes, the underpowered chipset in my laptop can sort of handle the special effects in Compiz. What changed? The new drivers in 9.04 did. Intel are apparently reshaping how their drivers work but while they do it performance has taken a back seat and is cheerfully swilling on beer while the computer does the heavy lifting up front. (errr)
Anyway, simple way to fix it? Revert to the driver in the previous version of Ubuntu! It’s horribly easy to do. Just follow this guide, update your apt sources, install the old driver and restart X. I did and now I have fancy windows bouncing here, there and everywhere! In fact, my wife used her online O2 account to send a few texts and the confirmation popup window hopped around the screen all on it’s own! Oh how we laughed!
Oh, and for anyone who uses a browser, there’s a really simple way to get a CPU upgrade for free. Download Chrome or Chromium (or for Ubuntu .debs) and give it a whirl. After using Firefox for many years it’s like a breath of fresh air, fast moving air that is as it zips along! OK, it’s not completely bug free. The latest builds have a problem with the “default browser” setting (grab a build from around Sep 4 but the fix will be available soon) but it’s the main browser on my Linux desktop and I love the thing!
That was quick:
# apt-get install linux-headers-server linux-image-server linux-server
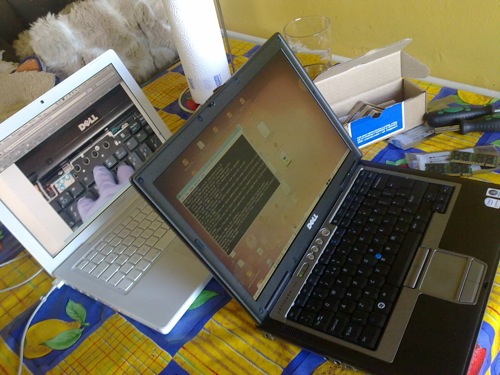
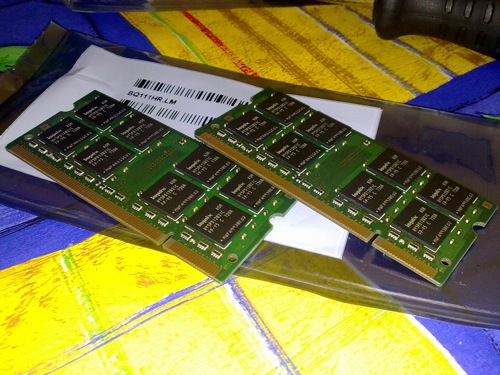
4GB of DDR2 RAM only cost me about 50 Euro. I’m sure I have a receipt for 8MB of SDRAM I bought years ago. Cost me 100 quid then. So, 4GB of RAM back then would have cost a small fortune.
Edit: the server kernel has terrible video performance (unsurprisingly), I’ve gone back to the desktop kernel and will recompile it when that 500MB of RAM becomes a real necessity (or I move to a 64 bit version of Ubuntu).
Modern computers use CPUs with multiple cores for performance reasons. Software can take advantage of that and use both cores to run separate threads but sometimes it’s useful if you can force a process to use one core rather than both.
In Linux that’s easy to do. If you’re using Ubuntu or Debian grab the schedutils package:
sudo apititude install schedutils
That will install a program called “taskset” which is a tool to “retrieve or set a process’s CPU affinity”. It’s really easy to use too.
I wanted to force Bibblelabs on to one core while importing photos.
# ps auxw|grep bibble
donncha 19482 78.7 33.1 1090388 681220 ? RNl 09:56 77:28 ./bibblepro
# taskset -p 19482
pid 19482’s current affinity mask: 3
# taskset -p 01 19482
pid 19482’s current affinity mask: 3
pid 19482’s new affinity mask: 1
The app is still heavy on the system, and “System Monitor” doesn’t suddenly show 0% usage on one CPU because I’m also running Firefox, Xchat, X, Gnome Terminal but I’d almost swear the browser window refreshes faster.
PS. Thanks to whoever told me about this on Twitter a while back. It had slipped my mind and I had to search for it again. Blogging it to remember it!
I don’t know when this happened but my external USB drives were running really slow. Reading RAW images off them took ages, backups took forever, and moving files back and forth was plain slow.
I use two Seagate FreeAgent external drives. They’re both USB 2 devices so should sustain more than the maximum 1MB/s I was seeing. I decided to go looking. First stop was /var/log/syslog where I found the following:
usb 2-1.2.4.4: new full speed USB device using uhci_hcd and address 13
usb 2-1.2.4.4: not running at top speed; connect to a high speed hub
To cut a long story short, after a few searches I found bug 66115 where the same problem is described. Unfortunately the ticket has since been closed but the work around discovered by Jean Pierre Rupp works for me too. I haven’t modified any files in /etc/ but unloading ehci_hcd and uhci_hcd and reloading in the correct order worked for me:
rmmod ehci_hcd
rmmod uhci_hcd
modprobe ehci_hcd
modprobe uhci_hcd
Now I get a very respectable 15-20MB/s when using rsync to transfer files from my internal drive and reads are super fast:
hdparm -tT /dev/sdi1
/dev/sdi1:
Timing cached reads: 3964 MB in 2.00 seconds = 1985.16 MB/sec
Timing buffered disk reads: 82 MB in 3.03 seconds = 27.08 MB/sec
Next on the TODO list is making sure the modules are loaded in the correct order on reboot. Time to dive into /etc