Sharing a large Immich library without melting the server

I share a photo library between two Immich users, my photos visible in my partner’s account, using an external library. Instead of uploading, Immich points at a folder on disk and imports whatever it finds there. It’s a lovely setup right up until the library gets big. Mine is big: over 750,000 photos, with more than half a million in a single external library.

Running out of memory

My server was struggling, chewing into swap all the time and running out of memory.

microservices worker error: Error [ERR_WORKER_OUT_OF_MEMORY]:
Worker terminated due to reaching memory limit: JS heap out of memory

I had Immich running in a 6GB Docker container but reduced that to 4GB for other reasons, and it appeared to work ok for a while, but it took a while for me to notice it was using the entirety of the 4GB of RAM. I increased the RAM allocated to the container, but it was still a heavy user.

The library watcher

External libraries have two ways to notice new files. There’s a periodic scan, which I’d already disabled because it’s brutal at this size. And there’s the watcher, which uses filesystem notifications to spot new files the moment they land. That’s what makes photos I add show up automatically.

The watcher is the convenient one. It’s also the expensive one. Watching a folder tree with 750,000 files means holding an enormous number of filesystem watches plus the bookkeeping that goes with them, and on my library that was around 3GB of resident memory, sitting there permanently doing nothing most of the time.

I turned it off in the admin settings. Memory use went from ~4GB pinned at the limit to about 1GB. Nightly jobs suddenly had room to breathe and the crash loop stopped.

Except now new photos don’t get imported, because the watcher was the thing importing them. So: how do you add a photo to a huge external library without a watcher and without a full scan?

The obvious fix that doesn’t work

Immich has an API endpoint to scan a library:

POST /api/libraries/{id}/scan

It scans the whole library. On my photo archive that’s a long, heavy crawl, and I’d already learned the hard way what a scan does to this box. Not something you run every time you drop in a picture.

Enqueue the import job yourself

So I went looking at what the watcher actually does when it sees a new file, expecting something complicated. It’s almost nothing. It queues one background job:

jobRepository.queue({
    name: 'LibrarySyncFiles',
    data: { libraryId, paths: [path] },
})

LibrarySyncFiles takes an explicit list of paths and imports exactly those files, without crawling the other 500,000. The per-file import I wanted was already sitting there. The watcher was only ever the trigger, and I was paying 3GB for the trigger.

I can pull that trigger myself. Immich uses BullMQ (backed by Redis/Valkey) for its job queue, so I can push the same job onto the same queue. The photos I add already go through a little script that moves them into the library folder by date, so the import hooks straight into that. When the script moves a new file in, it queues a LibrarySyncFiles job for that exact file:

docker exec -w /usr/src/app/server immich_server node -e '
  const { Queue } = require("bullmq");
  const q = new Queue("library", {
    prefix: "immich_bull",
    connection: { host: "redis", port: 6379 },
  });
  q.add("LibrarySyncFiles", {
    libraryId: "your-library-id",
    paths: ["/path/inside/the/container/to/new-photo.jpg"],
  }).then(() => q.close());
'

Immich picks it up, runs its normal import pipeline on that one file (metadata, thumbnails, the lot) and the photo appears. No watcher sitting on gigabytes of RAM, no full-library scan, and new photos still land within a cycle of my import script.

The caveats, because this is a hack

It leans on Immich’s internals, so: only send files that are genuinely new. The job handler inserts unconditionally, so hand it a path that’s already imported and you get a duplicate-key error in the logs. My script only queues files it actually moved.

More seriously, this is an internal job queue, not a public API. The queue name, the job name and the payload shape are implementation details, and an upgrade could rename or reshape any of them. The failure mode is silent: photos would just quietly stop importing and I wouldn’t find out until I went looking for one. My script shouts if the enqueue fails, which covers some of that but not all of it. This was working on Immich 3.0.2.

And turning off the watcher also turns off deletion detection, since the watcher is what removes assets when their files vanish. My workflow only ever adds files, so it doesn’t bite me. It might bite you.

There is a discussion here asking for an API endpoint to scan single files, but it hasn’t received much attention in 2 years, so I guess not many people have this issue, or realise it is an issue.

Was it worth it?

For a library this size, yes. About 3GB of RAM back, no more crash loop, and photos still import on their own. If your external library is small this is all irrelevant, so leave the watcher on and get on with your life. But if you’re in the hundreds of thousands of files and your server keeps falling over, check the watcher first.
Media Picker for Immich: Self-Hosted Photos in WordPress

I’ve just released Media Picker for Immich on the WordPress.org plugin directory. It connects WordPress to a self-hosted Immich server so you can browse, search, and insert your photos and videos into posts without copying files around.

Immich

I run Immich at home. It’s where my photos now live. They’re organised, searchable, with facial recognition and AI search. My WordPress uploads directory is where photos used to go, and the two never talked to each other. This plugin fixes that.

How it works

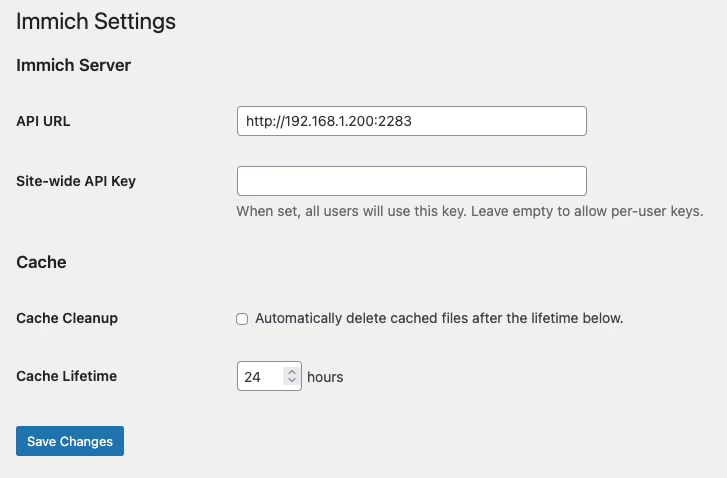
Point the plugin at your Immich server and give it an API key. You can set a site-wide key or let each user configure their own to connect to their own Immich account.

Screenshot 1: Settings → Immich:
Server address and blank site-wide API key, default cache settings

If the site-wide key is blank, each user adds their own key on their profile page. All Immich API calls happen server-side.

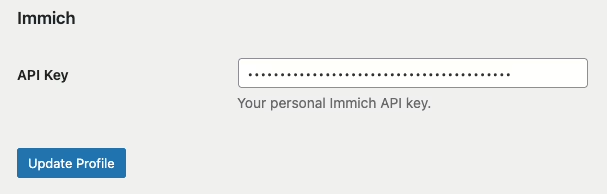
Screenshot 2: User Profile page, Immich API Key field showing *******.

Two ways to add media

Once configured, an Immich tab appears in two places.

The first is the Media Library grid. Switch to the Immich view and you can search, filter by person, and either Use or Copy assets into WordPress.

Screenshot 3: Media → Library, Immich view.
  • Use creates a virtual attachment. Nothing is copied; WordPress proxies the media from Immich on demand and caches it locally on first request. Your uploads directory stays lean.
  • Copy downloads the original file into wp-content/uploads/ as a normal attachment.

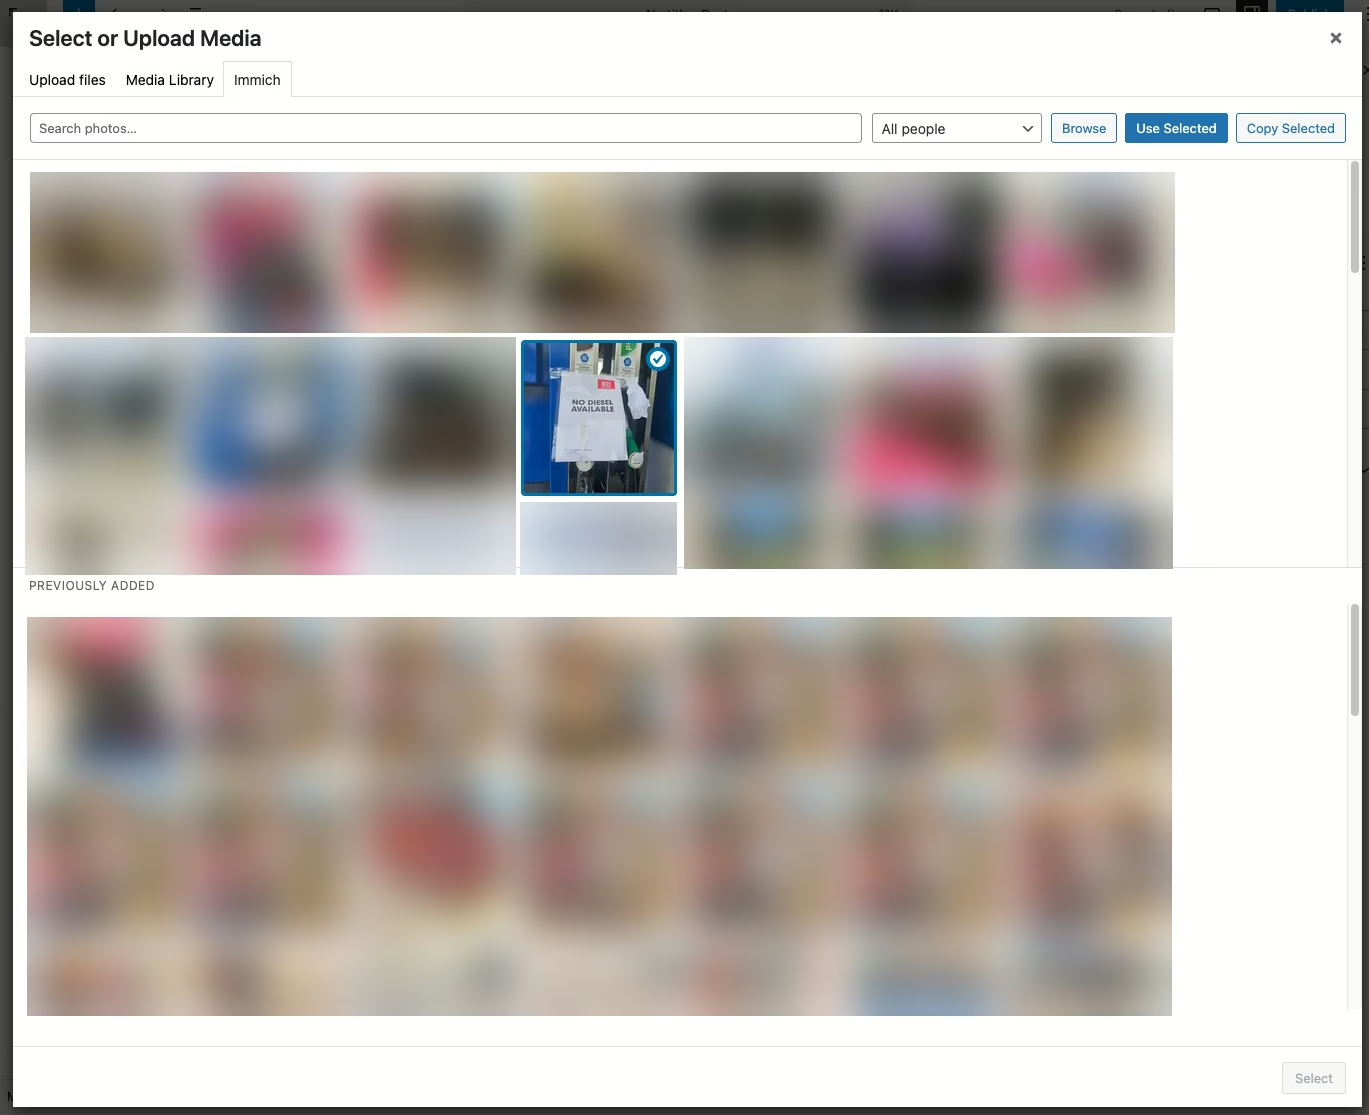
The same tab shows up in the “Select or Upload Media” dialog inside the post editor, so you can pull an Immich photo straight into a post without leaving the editor.

Screenshot 4: Select or Upload Media dialog, Immich tab.

A few details worth mentioning

  • Videos work too. Proxied videos stream with seek support.
  • Lightbox. Proxied Immich images in posts open a full-resolution lightbox on click.
  • Local cache. Proxied media is cached to wp-content/cache/immich/ after the first fetch. Optional cleanup with a configurable lifetime.
  • Your server stays private. Immich only needs to be reachable from WordPress — not from the public internet. Visitors never connect to Immich directly.
  • When images are copied over, virtually or otherwise, you can insert them into a post like any other image, which also includes adding them to galleries in posts.

Get it

Install it from the WordPress plugin directory or search for “media picker for Immich” in the plugins page in WordPress.

Feedback and bug reports are welcome. Development is done on GitHub here.

Creating a Shared Photo Library in Immich

If you’re using Immich to manage your photos, you may have discovered that sharing photos between users isn’t as straightforward as you’d like. Many users, particularly couples or families, want a shared folder where both parties can upload photos that are automatically visible to each other, complete with face recognition and smart search capabilities.

Boats in Crosshaven at sunset.

While Immich has shared albums, they don’t quite solve this problem. The photos don’t appear in search and aren’t processed for face recognition or analysis. What we really need is a true shared library where both users have full access to the same photos with all of Immich’s powerful features.

Here’s a solution using external libraries and symlinks that creates a pseudo-shared folder between Immich users.

The as yet new and unnamed bridge in Cork.

Important: If you rely on uploading photos through the Immich app on your phone this method won’t work for you. You’ll need to sync the photos some other way and copy them into an external library. I export my photos from Lightroom Classic on my laptop, and Syncthing syncs them to the Immich server. Everything is automated from the moment I publish them to the shared directory.

Fisherman's hut in Connemara.

This approach uses external libraries and symbolic links (symlinks) to create a shared photo directory that appears in both users’ Immich libraries. Each user uploads to their own “shared” directory, and through symlinks, those photos automatically appear in the other person’s library as well.

Requirements

  • Access to the Immich server’s file system (typically via SSH or direct access).
  • External libraries enabled for each user.
  • Basic familiarity with Linux commands.

Step-by-Step Setup

Let’s walk through this with an example using John and Mary, a couple who want to share their photos.

1. Set Up External Libraries

First, both users need to have external libraries configured in Immich. For this example, let’s say the external library on the server is this folder:

/mnt/external_library/

It will be mounted in Immich at /external_library/ in this example.

Create a directory structure like this:

/mnt/external_library/
├── john/
│   └── shared/
└── mary/
    └── shared/

2. Configure the External Libraries in Immich

In Immich’s admin web interface:

  • For John, add an external library pointing to /external_library/john
  • For Mary, add an external library pointing to /external_library/mary

3. Create the Symlinks

This is where the magic happens. We’ll create symbolic links that connect each person’s shared directory to the other person’s external library.

Log in to the Immich server and run these commands:

cd /mnt/external_library/john/
ln -s ../mary/shared mary_files
cd ../mary
ln -s ../john/shared john_files

4. Upload and Scan

Now when John uploads photos to /mnt/external_library/john/shared/, they will:

  • Appear in his own Immich library
  • Automatically appear in Mary’s library (via the symlink at /mnt/external_library/mary/john_files)

The same works in reverse for Mary’s uploads.

After uploading, trigger a scan of the external libraries in Immich, and both users will see the shared photos.

A red deer digs up grass during the rutting in Killarney.

How It Works

A symbolic link is like a shortcut that points to another location in the filesystem. When Mary’s Immich library scans /external_library/mary/, it finds the john_files symlink and follows it to John’s actual shared directory. From Immich’s perspective, it looks like Mary has those photos in her library, but they’re actually stored in John’s directory.

Advantages

  • Full Immich functionality: Both users get face recognition, smart search, and all other Immich features on the shared photos
  • Simple uploads: Just upload to your own shared directory—no manual copying needed
  • Bidirectional sharing: Both users can add photos that the other will see
  • Single source of truth: Each photo is stored once (by the person who uploaded it)

Disadvantages

  • Duplicate processing: Immich will process each shared photo twice—once for each user. This means:
    • Face recognition runs twice.
    • Smart search/ML classification runs twice.
    • More CPU and storage usage for thumbnails and metadata.
  • File ownership: Photos remain in the uploader’s directory. If John deletes his Immich library or account, Mary loses access to his photos.
  • Requires server access: You need command-line access to the server to set up symlinks.

Important Notes

  • Upload directly to external libraries: Don’t upload to your main Immich library through the app. Upload directly to the shared directory in your external library.
  • Backup strategy: Make sure your backup solution covers the external library directories.
  • Permissions: Ensure that the Immich container has proper read permissions for all directories involved.
A man in a black coat and cap looks to the side in front of a "SALE" sign with people on the sign.
A young girl sits on the wall nearby.

Conclusion

While this solution requires some technical setup and comes with the overhead of duplicate processing, it provides a practical way to share photos between Immich users with full functionality. This approach has proven reliable for my wife and me, who wanted a shared family photo library without waiting for native multi-user library support in Immich.

If you’re comfortable with the command line and the tradeoff of duplicate processing, this solution provides the shared photo experience many users are looking for.

Playing around with Immich again

Immich Logo

Immich is a self-hosted Google Photos. That’s the simplest way to describe it. It can run in a Docker container and will happily live on your local network, without access to the Internet unless you want to. They do warn you that, “The project is under very active development”, so bugfixes are happening all the time. At the same time, bugs are sometimes introduced, and breaking changes are sign posted weeks in advance.

Immich. How do you pronounce it? I say it with a hard “CH” at the end, but others will say it sounds more like “image”, which leads me to think that’s probably the way to pronounce it.

It looks uncannily like Google Photos. It doesn’t have all the bells and whistles of it’s older, proprietary inspiration, but it does have some very useful features.

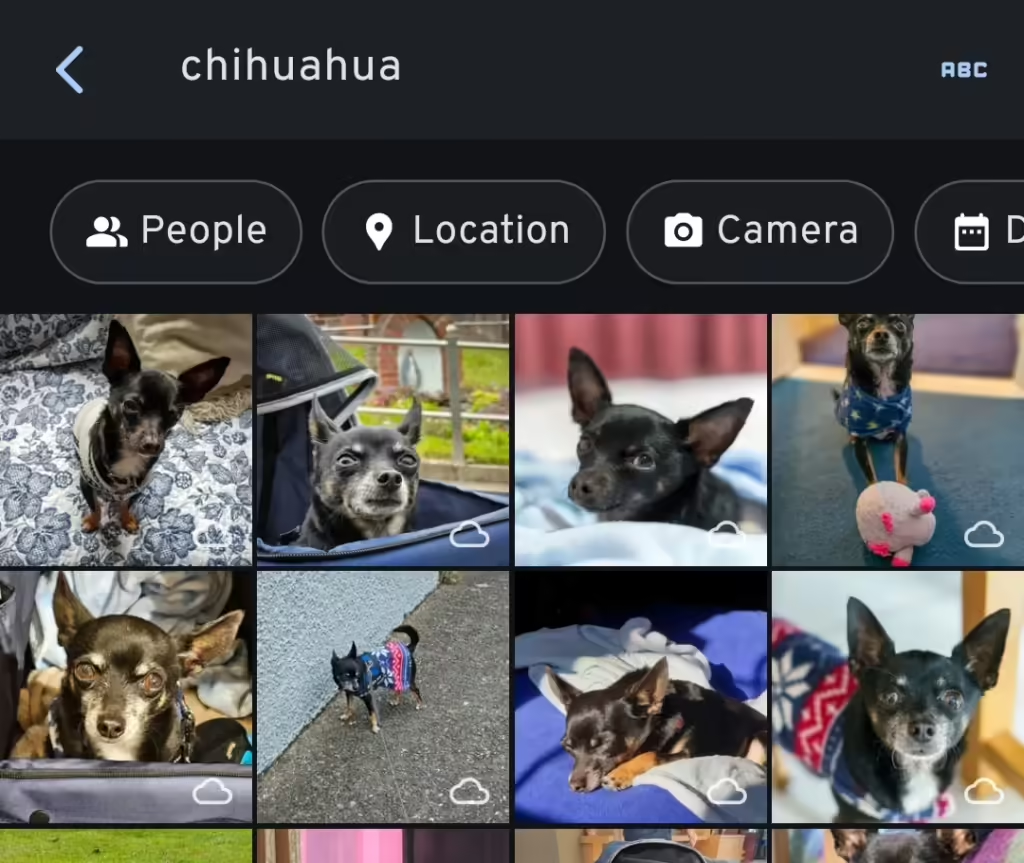
I love the face and object recognition in Immich. I can search by people on the Explore page, and search for objects too. It doesn’t present animals on the Explore page, but searching for “chihuahua” leads me to lots of photos of Diego. It’s face recognition that doesn’t go to feeding a gigantic corporation too. It works pretty well, but make sure your Docker install has enough RAM, or it will silently fail.

A screenshot of the Immich mobile app showing a search for chihuahua and thumbnails of my dog.

It has partner sharing too, which is of course a handy feature for families. I noticed that partner shared photos can’t be discovered through the Explore page, where you find face recognition and places. There’s a GitHub issue about this, so it’s something they’re aware of. To be fair, Google Photos has the same limitation (I think) unless you’ve copied the photos to your account, using your precious free space.

To get around this limitation, I symlink any shared photos to my wife’s account. I use External Libraries for 99% of my photos, and 100% of the photos that come from Adobe Lightroom. I export photos to “single” or “shared” directories, and a shell script moves them all to my Immich External Library, and symlinks the shared photos to my wife’s one. On the External Libraries admin page, I simply “Scan new library files” to import the symlinked files. Immich is smart enough to pick up the new files in my External Library. Files are scanned twice, with thumbnails made twice, and face recognition done twice, but the overhead in space used isn’t too bad.

The Quick Start docs tell you to use Docker to install, and if you are at all familiar with Docker, this should be easy enough to follow.

When you do get Immich installed, make sure you perform backups. I have all the images stored elsewhere, but I back up the database file with the docker command listed on that page. Syncthing copies it to another machine, where it’s backed up daily.

Another option is the Nextcloud Memories app which is very slick and looks great. It has face and object recognition too, but it depends on another Nextcloud app to do those jobs. It doesn’t have partner sharing, however, which is the main reason I tried out Immich.

If you do decide to expose your Immich install to the Internet, take a look at Cosmos Cloud. There are other options too, like Caddy or Nginx Proxy Manager. Getting an HTTPS certificate has never been easier. If you don’t know your IP, have a look at https://checkip.amazonaws.com too.