This morning I saw a notification on the Adobe “Creative Cloud” app I can get pro tips for photographing people…. etc etc. I thought it was the usual material Adobe brings out, which to be fair, is quite good, so I clicked it.
It’s odd that the news item is from a week ago, but I only saw the notification now, but that happens. The page loaded in the background while I checked other things in another window. I glanced back and saw the ublock origin was stopping a tracking redirect. Uh oh. The only thing I had loaded was that Adobe link. Curious, I let it through until it redirected to a spam page on iyfbodn.com.
I was expecting something that looked more like the website that was archived last year. A quick whois of adobeyourshotyourstory.com shows it was updated in October last year, but the domain now appears to be owned by someone in Tbilisi, Georgia!
I am very interested to hear how this happened. It’s one thing to take over a prominent domain (Adobe last mentioned the domain on Twitter in June 2022) but to get a notification in the Creative Cloud app that redirects to a spam site is quite an achievement. Unfortunately.
Hot off my RSS feeds is GraXpert which I found through this Fstoppers article. It corrects colour tints and gradients in astrophotography shots. I don’t do much astrophotograpy:
late nights
cloudy nights
clear nights are cold
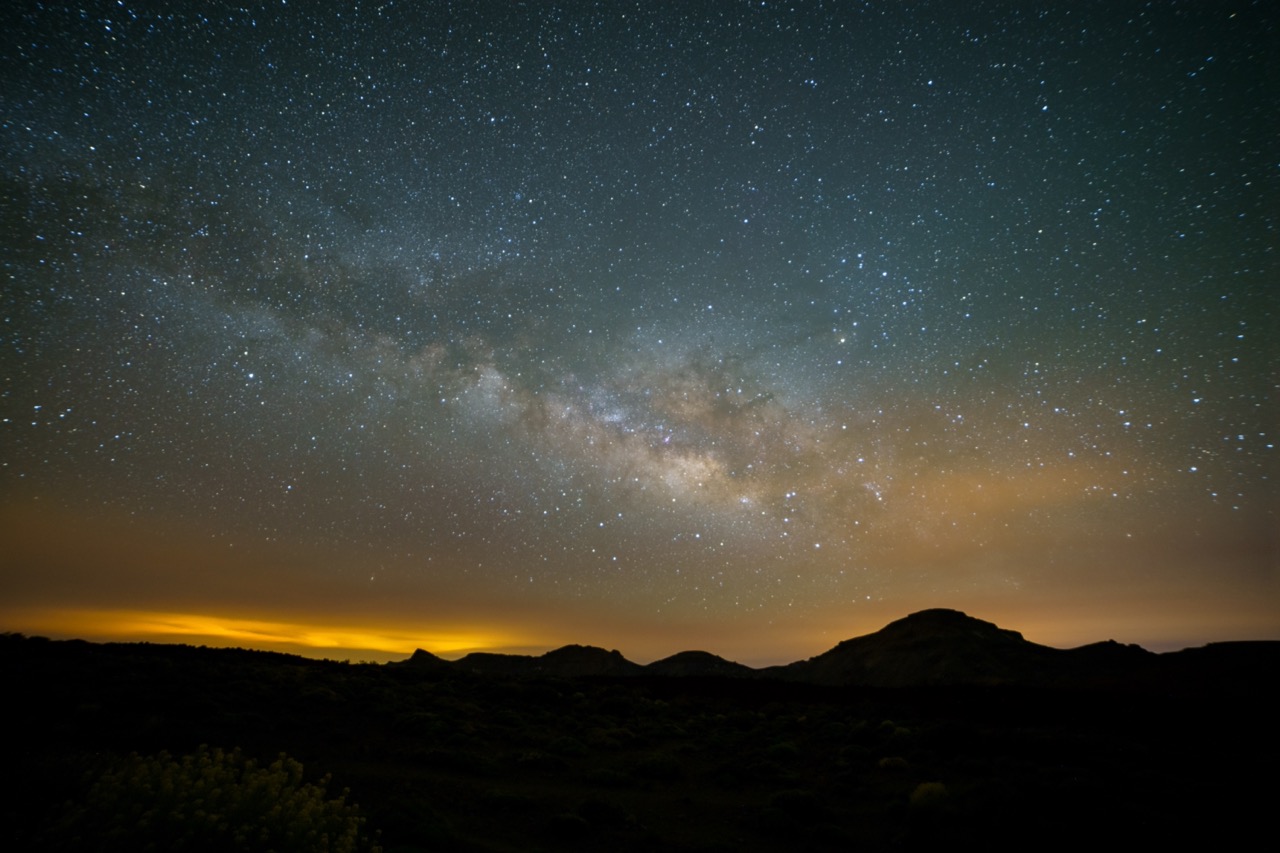
But when I do, I get colour tints from nearby towns and cities, or I add it myself thinking it looked better. I’m still very much a newbie when it comes to this sort of thing. Anyway, here is a Milky Way photo I took in Tenerife last year. I thought it came out pretty well, despite my attempts to make it look better.
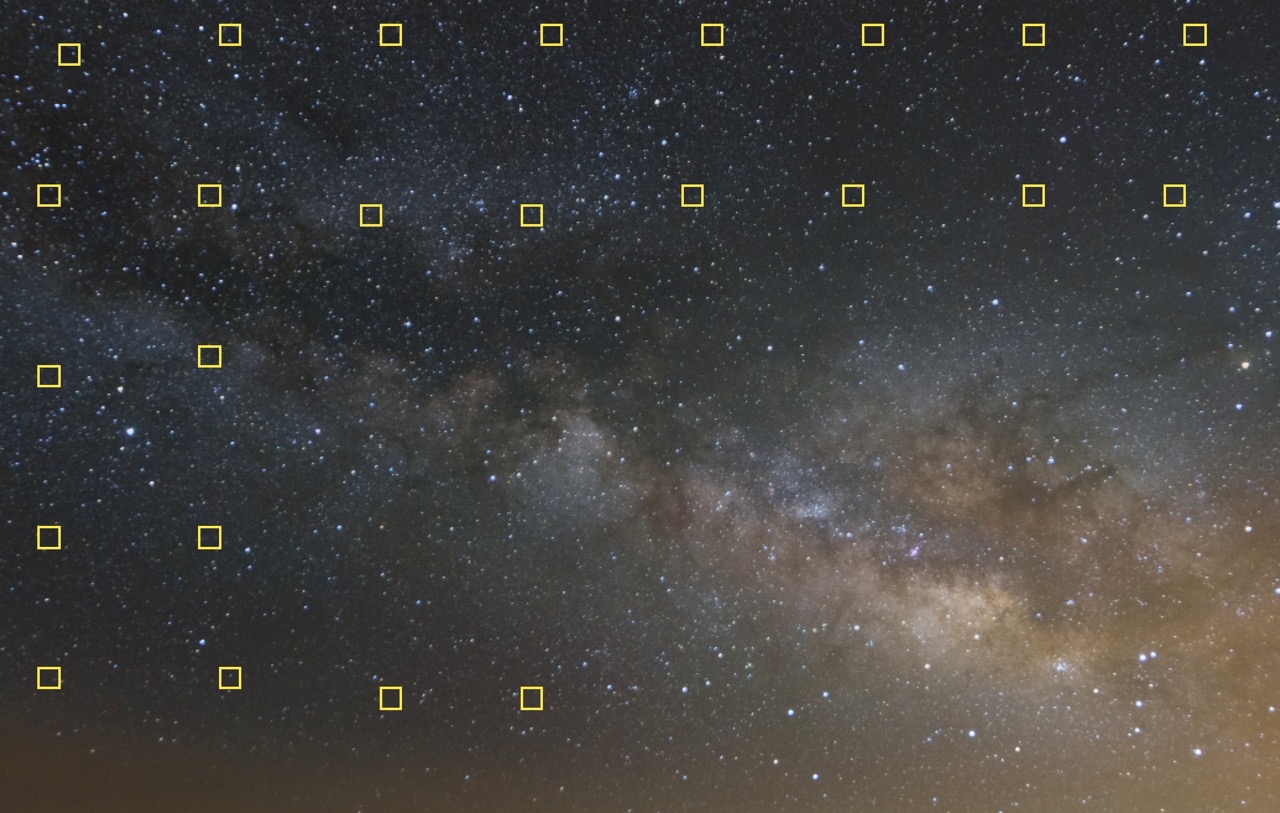
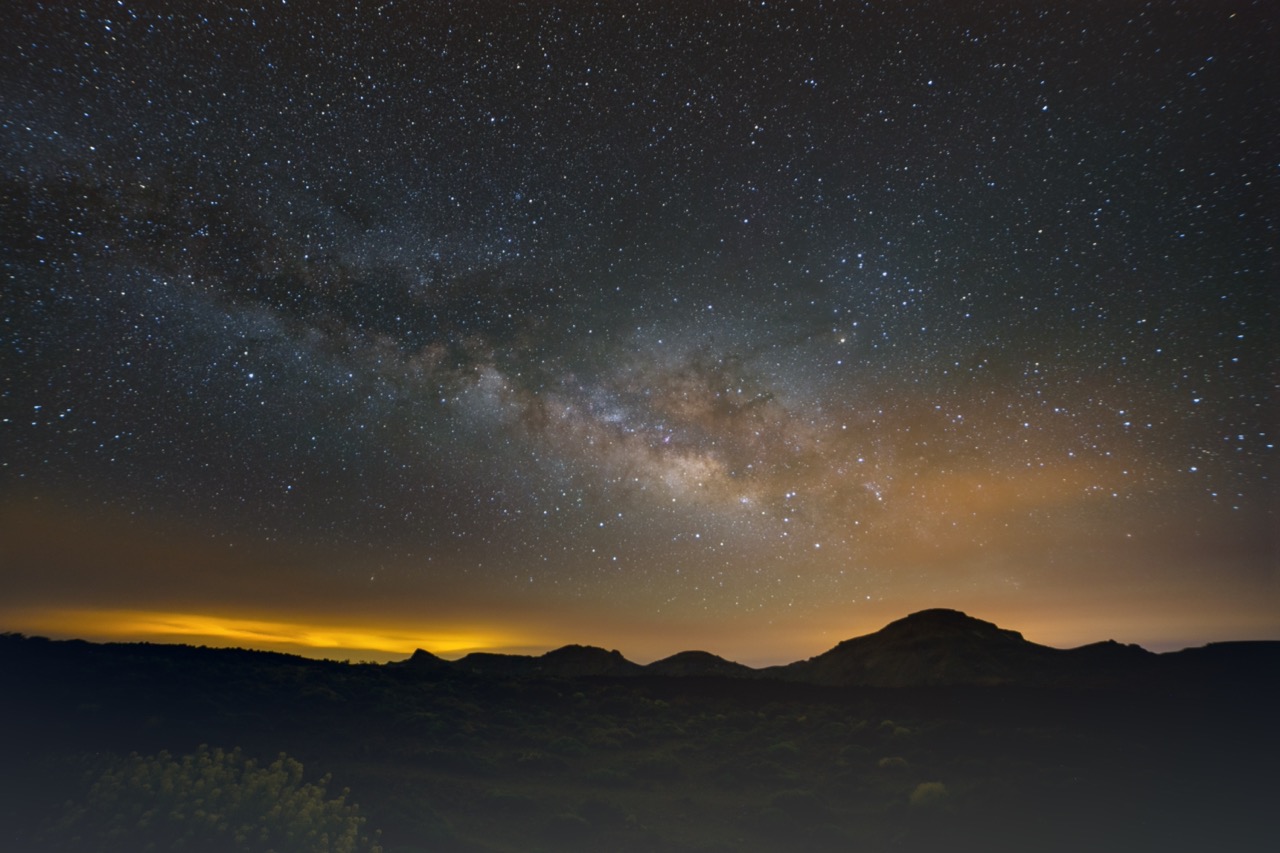
From March to the end of August is the best time to shoot the Milky Way in Ireland, and I have to admit I rarely ventured out to try this sort of photography since taking that photo in Tenerife. So, when I read about GraXpert that was the photo that sprang to mind. I loaded the original tiff file into it, pressed the “Create Grid” button, and then hit the “Calculate Background” button. I’m rather pleased with the results!
The GraXpert Grid
I did no other work with this, which is why you can see the foreground, but even so, it got rid of that green colour cast in the sky.
GraXpert is free, open source software. It’s not a plugin of Lightroom or Photoshop, but it’s easy to generate a TIFF file for Photoshop from Lightroom, and then open it in an external programme. It’s definitely worth a try if you have any astro photos you need to work on.
I learned something new about Google Photos. I can examine the photos taken between two dates by entering #date_range:YYYYMMDD-YYYYMMDD in the search box.
I have images going back more than twenty years in Google Photos so a way to view a selection of those images is really useful!
St Patrick’s Day, 2019
I haven’t been using Google Photos as much since they added space limitations, but this search will still be useful!
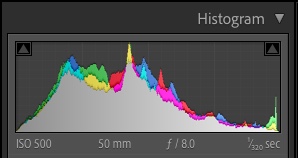
I discovered yesterday (or maybe rediscovered?) that you can drag the histogram in Lightroom to adjust the exposure of a photo.
From right to left, these are the sliders affected when you drag:
Blacks
Shadows
Exposure
Highlights
Whites
It can appear like a blunt, inaccurate tool to modify the exposure of a photo, but do it at least once, and you’ll get a better appreciation for what the histogram actually displays.
If you’re in this part of the world, then daylight savings means the clocks went back an hour last weekend. Your phone adjusted itself, as did some other gadgets, but your oven probably didn’t, and your camera almost certainly didn’t update either.
I couldn’t possibly describe how to fix the time on your camera, but on my Sony A7III I was able to disable “daylight savings time” and the time was corrected. I need to switch it back on next Spring, of course.
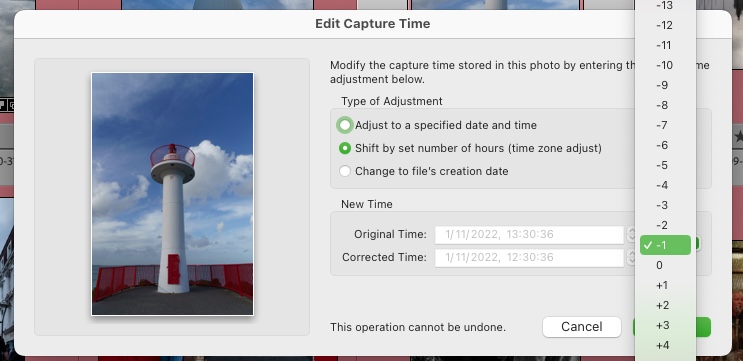
If, like me, you forgot to do that on Sunday morning, or even worse, you’re in the USA where they switched a few weeks ago, you can use a handy tool in Lightroom to fix the time on any photos you took. It’s in Metadata->Edit Capture Time… and you can adjust the time on multiple photos at a time.
Good thing too, as I had to adjust the time on several hundred photos.
Of course, if you’ve been travelling to another timezone and forgot to adjust your camera time, you should use “Edit Capture Time” to fix the time on those photos too. Years later, you’ll wonder why photos taken at noon are pitch black, and it wasn’t an eclipse…
Well, I bought several books recently. They’re all photography books, but I wanted to share one photo from the book I bought yesterday.
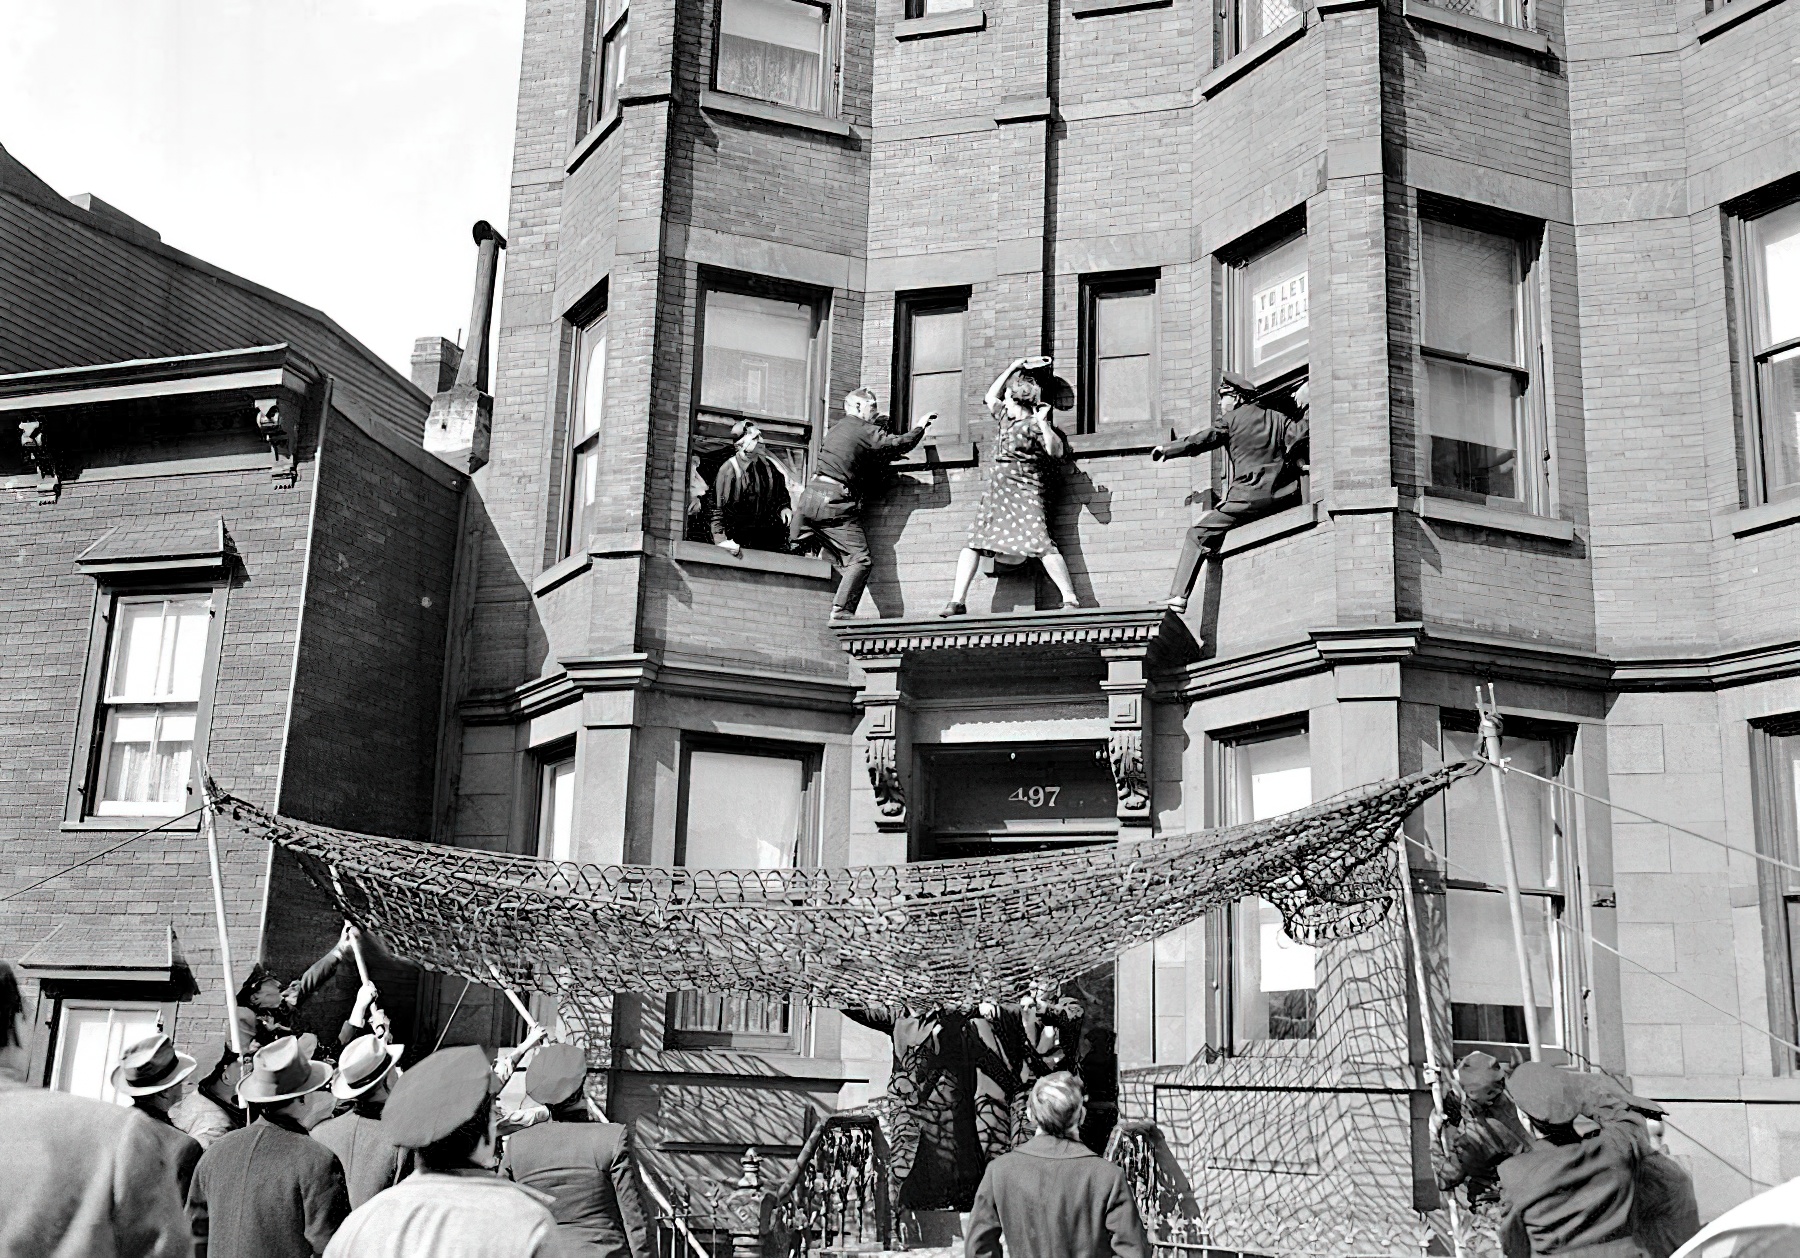
Edna Egbert on the ledge, No. 497 Dean Street. 1942.
The book is New York exposed : photographs from the Daily News, and you can read it online on archive.org or buy it in a few places if you search for it.
When I flipped through the book in Vibes & Scribes this photo was the first one I saw and immediately grabbed me. It totally looks staged, but Edna’s son, Fred, got married, joined the army, and had not written to his mother since, and she was distraught! I don’t know if she could have killed herself landing on the steps of that house, but there were sharp spikes on the railings if she had jumped far enough, so who knows? It was a cry for help.
A policeman kept her talking for 25 minutes while others rigged a net.
As officers Ed Murphy and George Munday tried to persuade her to come back into the building, she brandished a mirror and started swinging it at them. The police grabbed her arms and she proceeded to sit on the ledge.
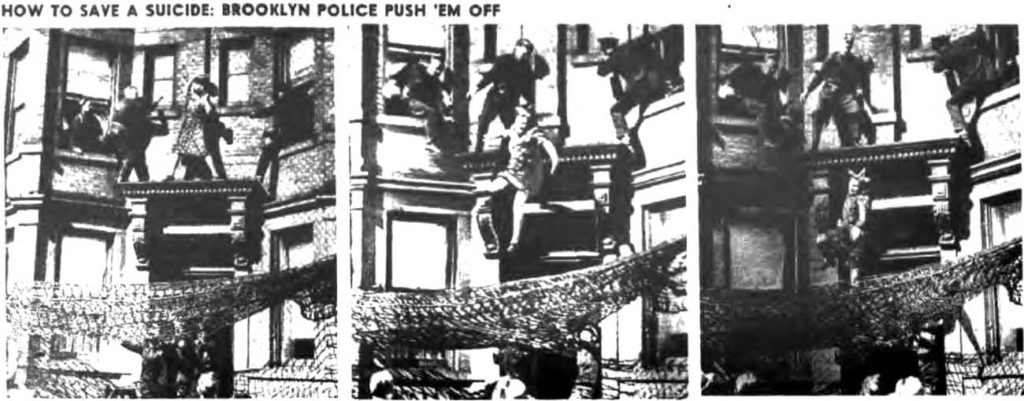
600 people gathered to watch. The police tried to persuade her to come in the window, but she either jumped or was finally pushed to fall safely in the net.
According to census records, Mrs. Egbert was either 42 or 44-years-old, not 50 as noted in every article about this story. Her husband John Egbert was 64 and their wayward son Fred was 20. Whatever became of Mrs. Egbert and her non-writing son Fred is unknown.
The book is full of other great photos, some you’ll recognise and descriptions to explain what’s happening. Borrow it for an hour on archive.org and take a look through it.
Instagram is becoming a video site (mirror) like TikTok, isn’t it? I want to see photos when I go to Instagram. I don’t want to see reel after reel from suggested accounts just because I liked something random. I only ever post photos on Instagram, so this is a shout out to anyone who follows me and doesn’t see my fabulous/amazing/gorgeous photos! You’re missing out!
Flowers in Waterloo
There are two ways to get control back.
Add 50 of your friends to the Favourites list.
Use the Following feed instead of the algorithm.
Both features were only added in March this year, so you might not be familiar with them, even if you’re a long-time user.
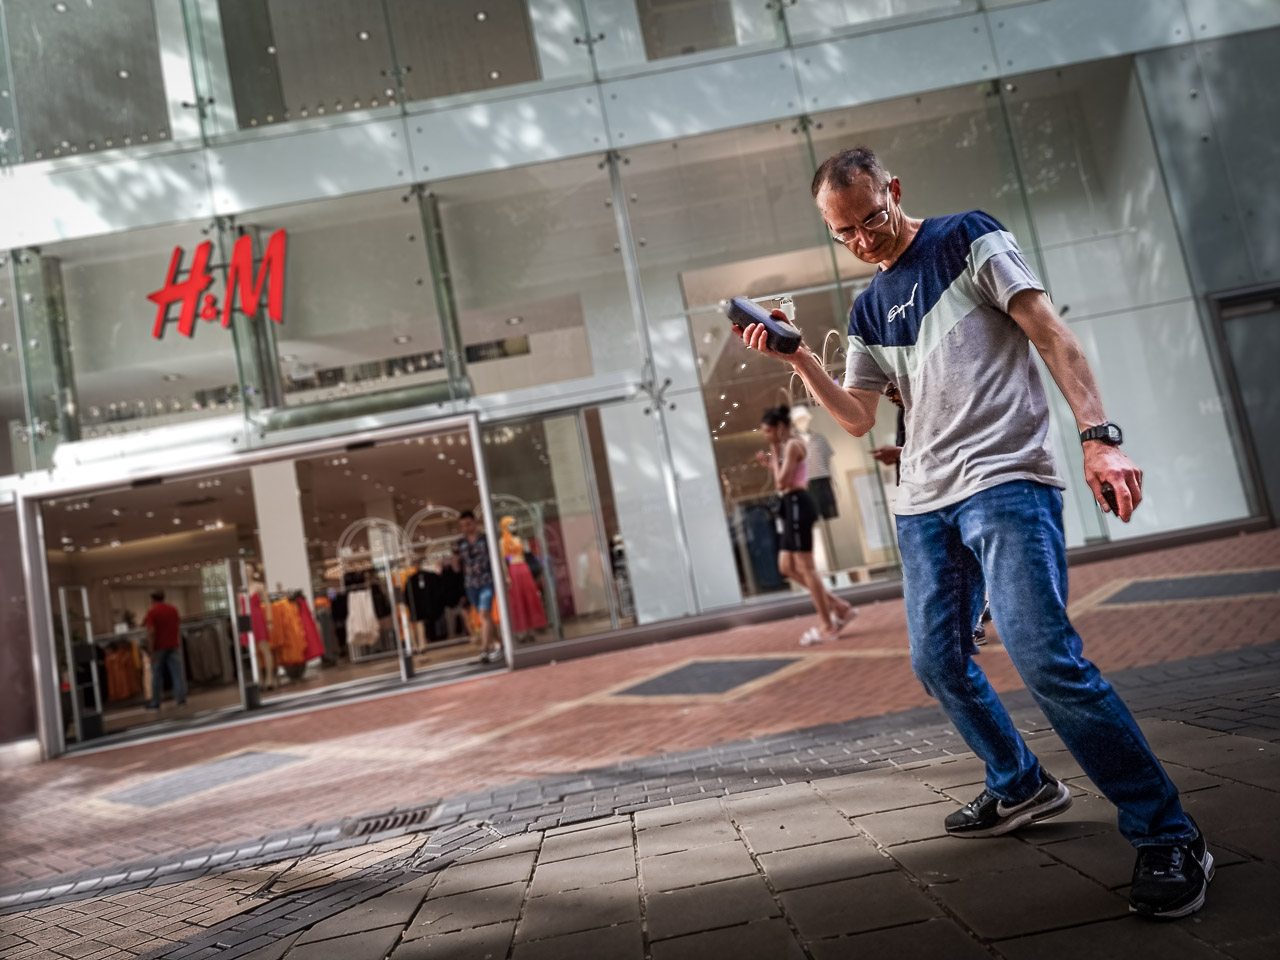
Dancing in Birmingham
The favourites list is a list of up to 50 Instagram accounts you want to see first in your feed when you open the app. You’ll still see suggested reels and other nonsense, but these 50 accounts will be given priority.
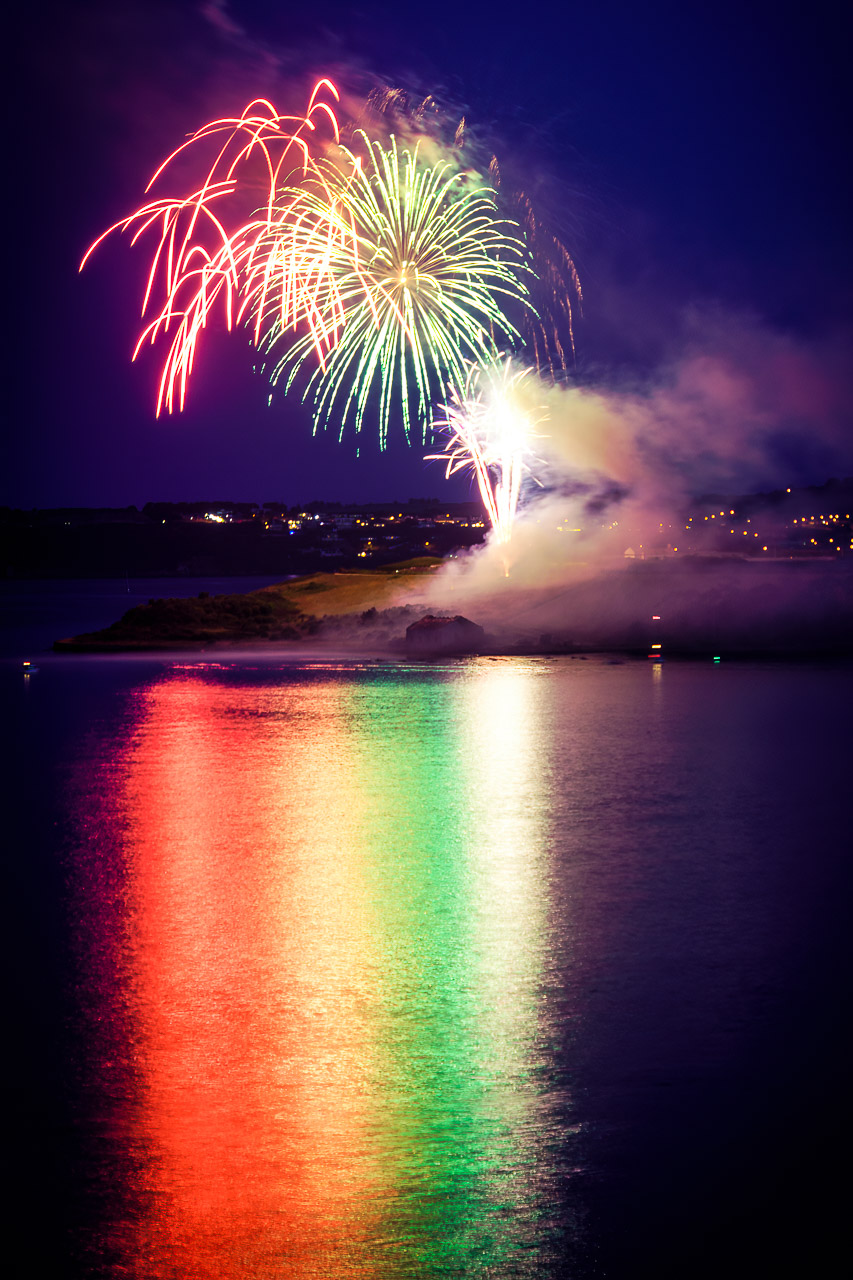
Fireworks on Spike Island
There are two ways to fill up your favourites list. Either go to the profile of the account you want to add, click on “Following” and then tap “Add to Favourites”, or open your own profile, tap the burger menu (the 3 lines at the top-right of the screen) to open settings, and tap Favourites where you will be shown a selection of your friends, and a search box to look for others.
The other way is much simpler and allows you to view your feed in a chronological order. And, don’t let Instagram know, but it appears to be advert free too! Tap on the Instagram logo on the top-left of the screen and you’ll see a menu saying Following and Favorites. The Favorites feed will obviously show your favourite accounts, but the Following feed is what I’m interested in.
The Following feed is a refreshing look at Instagram. It’s chronological, so you start from the newest photo or video uploaded by your Instagram friends. You’ll suddenly see posts from people you haven’t seen in years because the algorithm decided you weren’t interested in their photos! If you do nothing else after reading this post, try the Following feed. Let me know what you think of it.
Any time we go out Diego does his best to let us know that we can not possibly go out without him. This is why I’ve been spotted carrying him around supermarkets in a special carrier bag, or been booted out of other supermarkets for having him in that bag or in town where life would really be much less stressful if he wasn’t with us.
Nik Collection 4.0 was announced recently but comments here say that if you have a previous version it always shows an update warning that can’t be turned off.
Within a couple weeks of usage, I received the on-screen notification when launching the software below telling me to update. However, clicking on that “Install Now” button neither downloads nor installs a software update but instead, takes me back to the DxO website and prompts me to purchase brand new software.
If you’re curious, the original Nik Collection that was made free by Google in 2016 still works. You can grab it on Mac and Windows from this page at archive.org.
James Popsys explains how he picks the best photos from his shoots. Video is pre-pandemic. It’s refreshing to hear someone mention going out to photograph and not mention social distancing.
“In the field” shoot a black image if you see “the one” that works.
In Lightroom import your photos immediately. Do not sort and choose when you get home.
He uses stars in Lightroom. In the first round he awards up to three stars:
Single star – photo must be interesting and sharp (in the right places)
Another star – does the composition work?
Another star – is it exposed correctly?
For the second round, he only shows photos that have two stars or more. So that should show photos that are interesting and sharp, and either composition works or exposed correctly. In this round he changes composition by cropping and/or fixes exposure. Should have a few more three star photos.
At this point he’ll do more editing, and the best photos get another star. The very best get five stars.
I’m blogging this because I’ve had this video open in my browser tabs for months, meaning to try out this technique but I learn a process like this better if it’s written down. Hope it helps somebody!
Close
Ad-blocker not detected
Consider installing a browser extension that blocks ads and other malicious scripts in your browser to protect your privacy and security. Here are a few options.
uBlock Origin is a free, open source, ad blocker for your browser.
Use pi-hole if you have a spare Raspberry Pi on your network.
Set the private DNS settings on your phone to dns.adguard.com to block adverts and trackers.