
Today saw the release of updates to two plugins I work on. The first, unsurprisingly, is WP Super Cache, and it’s a bug fix release. It fixed a PHP8.2 warning, adjusted some labels on the settings page, solved a problem with “late init” and POST requests, and some other changes, but the major news I want to share is not about that plugin at all.
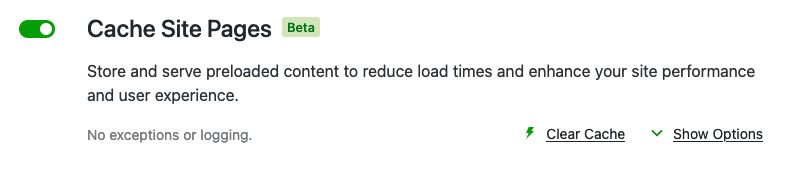
I’m on the Jetpack Boost team in Automattic, and for the last month or so, we’ve been working on adding a full-page cache to the plugin!
Jetpack Boost is already a pretty remarkable plugin, with what it does to CSS, JavaScript and images, so a page cache was an obvious next step.
If you’re already using WP Super Cache, but you’re not using any of the advanced features, I think you should give Jetpack Boost a go. It works really well at serving cached pages fast. Jetpack Boost will be a drop-in replacement if you have these features enabled in WP Super Cache:
- Simple caching
- Caching Disabled for logged in visitors
- Garbage collection set to one hour.
You’ll have to disable WP Super Cache first before trying Boost Cache, as they both rely on the same mechanism to load. Disable Jetpack Boost to go back to WP Super Cache. You can enable Boost again, without using the Cache module, and the two plugins will happily co-exist.
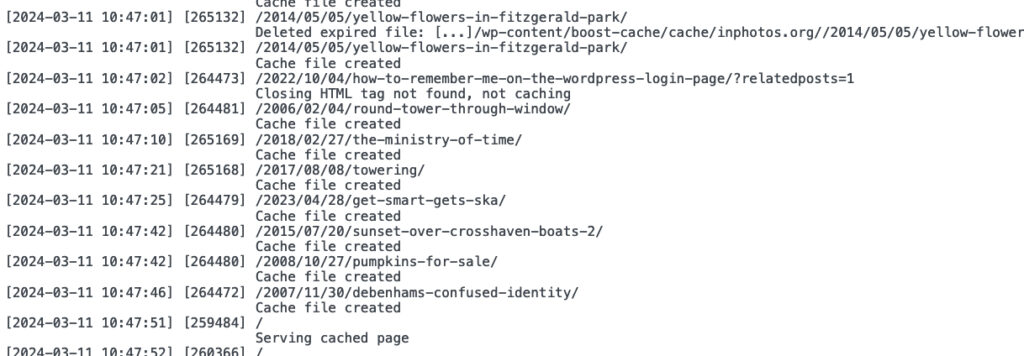
I’ve been using it here for the last two weeks, and it has worked flawlessly. I post images daily on my photoblog, and they get shared to Mastodon, where the expected deluge of requests from hundreds of servers happens each time. Between Jetpack Boost and WP Rest Cache, my server barely noticed. Just like with WP Super Cache.
“If it performs just like WP Super Cache, why should I use Boost?” I hear you asking. For some, you’ll need the extra features of WP Super Cache, but otherwise, Boost may be just what you need. Apart from the cache, it also has remarkable features that will squash your CSS and JavaScript in various ways that load super quick. Give it a go, and let WP Super Cache handle the cache if you need to.
If you’re still here, read on, and I’ll give you a whirlwind tour.

Boost supports an exception list like WP Super Cache does, and logging of activities in a similar, but easier to use way.
To simplify caching, only requests by logged out visitors are cached now, but that’s the recommended way of using WP Super Cache too.
Developers: like WP Super Cache, it also supports the “DONOTCACHEPAGE” constant. If you define that while a page is being created, then Jetpack Boost won’t cache it. If you can enable it before the page loads, then the plugin won’t serve a cached page either, but that will be difficult since the cache system loads so early.
To learn more, there’s a fine manual to read. It explains in detail how to enable the cache and how to use it. Yes, I’m biased, but I think you should give Jetpack Boost a go! Caching helps a lot, but the extra CSS and JavaScript features help render the page quickly once loaded.