

How do you stay in touch when you can’t stay in touch during a Covid19 lockdown?
Author Archives: Donncha
I would have liked to meet Ted Baldwin

“I told you I was sick”
This is a gravestone in the graveyard of St. James’s Church in Durrus, Sheep’s Head as pictured in 2014. Ted died well before his time at a young age and I have no idea who he was but to judge by his final message he must have been an interesting character.
I came across this after posting today’s photo of this church in Durrus on my photoblog.
Customs declaration
I’ll say it now before I get used to it.
Seeing a customs declaration on a package from the UK is really weird, and disappointing. #brexit
50% of our energy came from renewables

In the last 24 hours just over 50% of the electricity generated in Ireland came from renewables. We even exported 4% of our electricity.
Of course the wind isn’t blowing this hard every day, or it’s blowing too hard, and over the course of the last month the portion of renewable energy drops to 39%.
All this information is available on the Eirgrid Smart Grid Dashboard. Lots of information there including a log of wind speeds you can download, interconnection graphs showing our imports and exports of electricity from the UK and CO2 intensity & emissions data too. You can compare CO2 intensity against other parameters such as wind generation. The last few days have been very windy.

For more energy statistics take a look at the transport page on the SEAI website.
The amount of petrol consumed in Ireland reduced by more than half between 2007 and 2018 as a result of the shift to diesel cars. The increase in diesel use for private cars was offset by lower diesel use in freight. Diesel use was 12% higher in 2018 than 2007.
Renewable transport fuels have grown from a low base to over 3% of transport final energy use in 2018. This is almost all from biofuels blended with petrol and diesel. Electricity remained at just 0.1% of transport final energy demand in 2018. Most of this was from Luas and DART, but electric vehicles are growing strongly from a low base.
Im not sure whats wrong

Spotted on Facebook recently.
Fairlight Intro Remix
This one’s for the C64 fans out there. The Commodore 64 had a huge piracy problem but the groups that distributed games often put small intros at the start to show off. The same thing happened on all platforms and I presume still does, but with the advent of Steam and Humble Bundle it’s easier to buy games than pirate them.
Fairlight was one such group and used the same intro and music for a number of games.
LukHash has created a great remix of the Fairlight intro music that will leave you wanting more. It starts off simple but then the remix kicks in and I love it! He has a Bandcamp page too where you can download an album of his work.
Berniemania
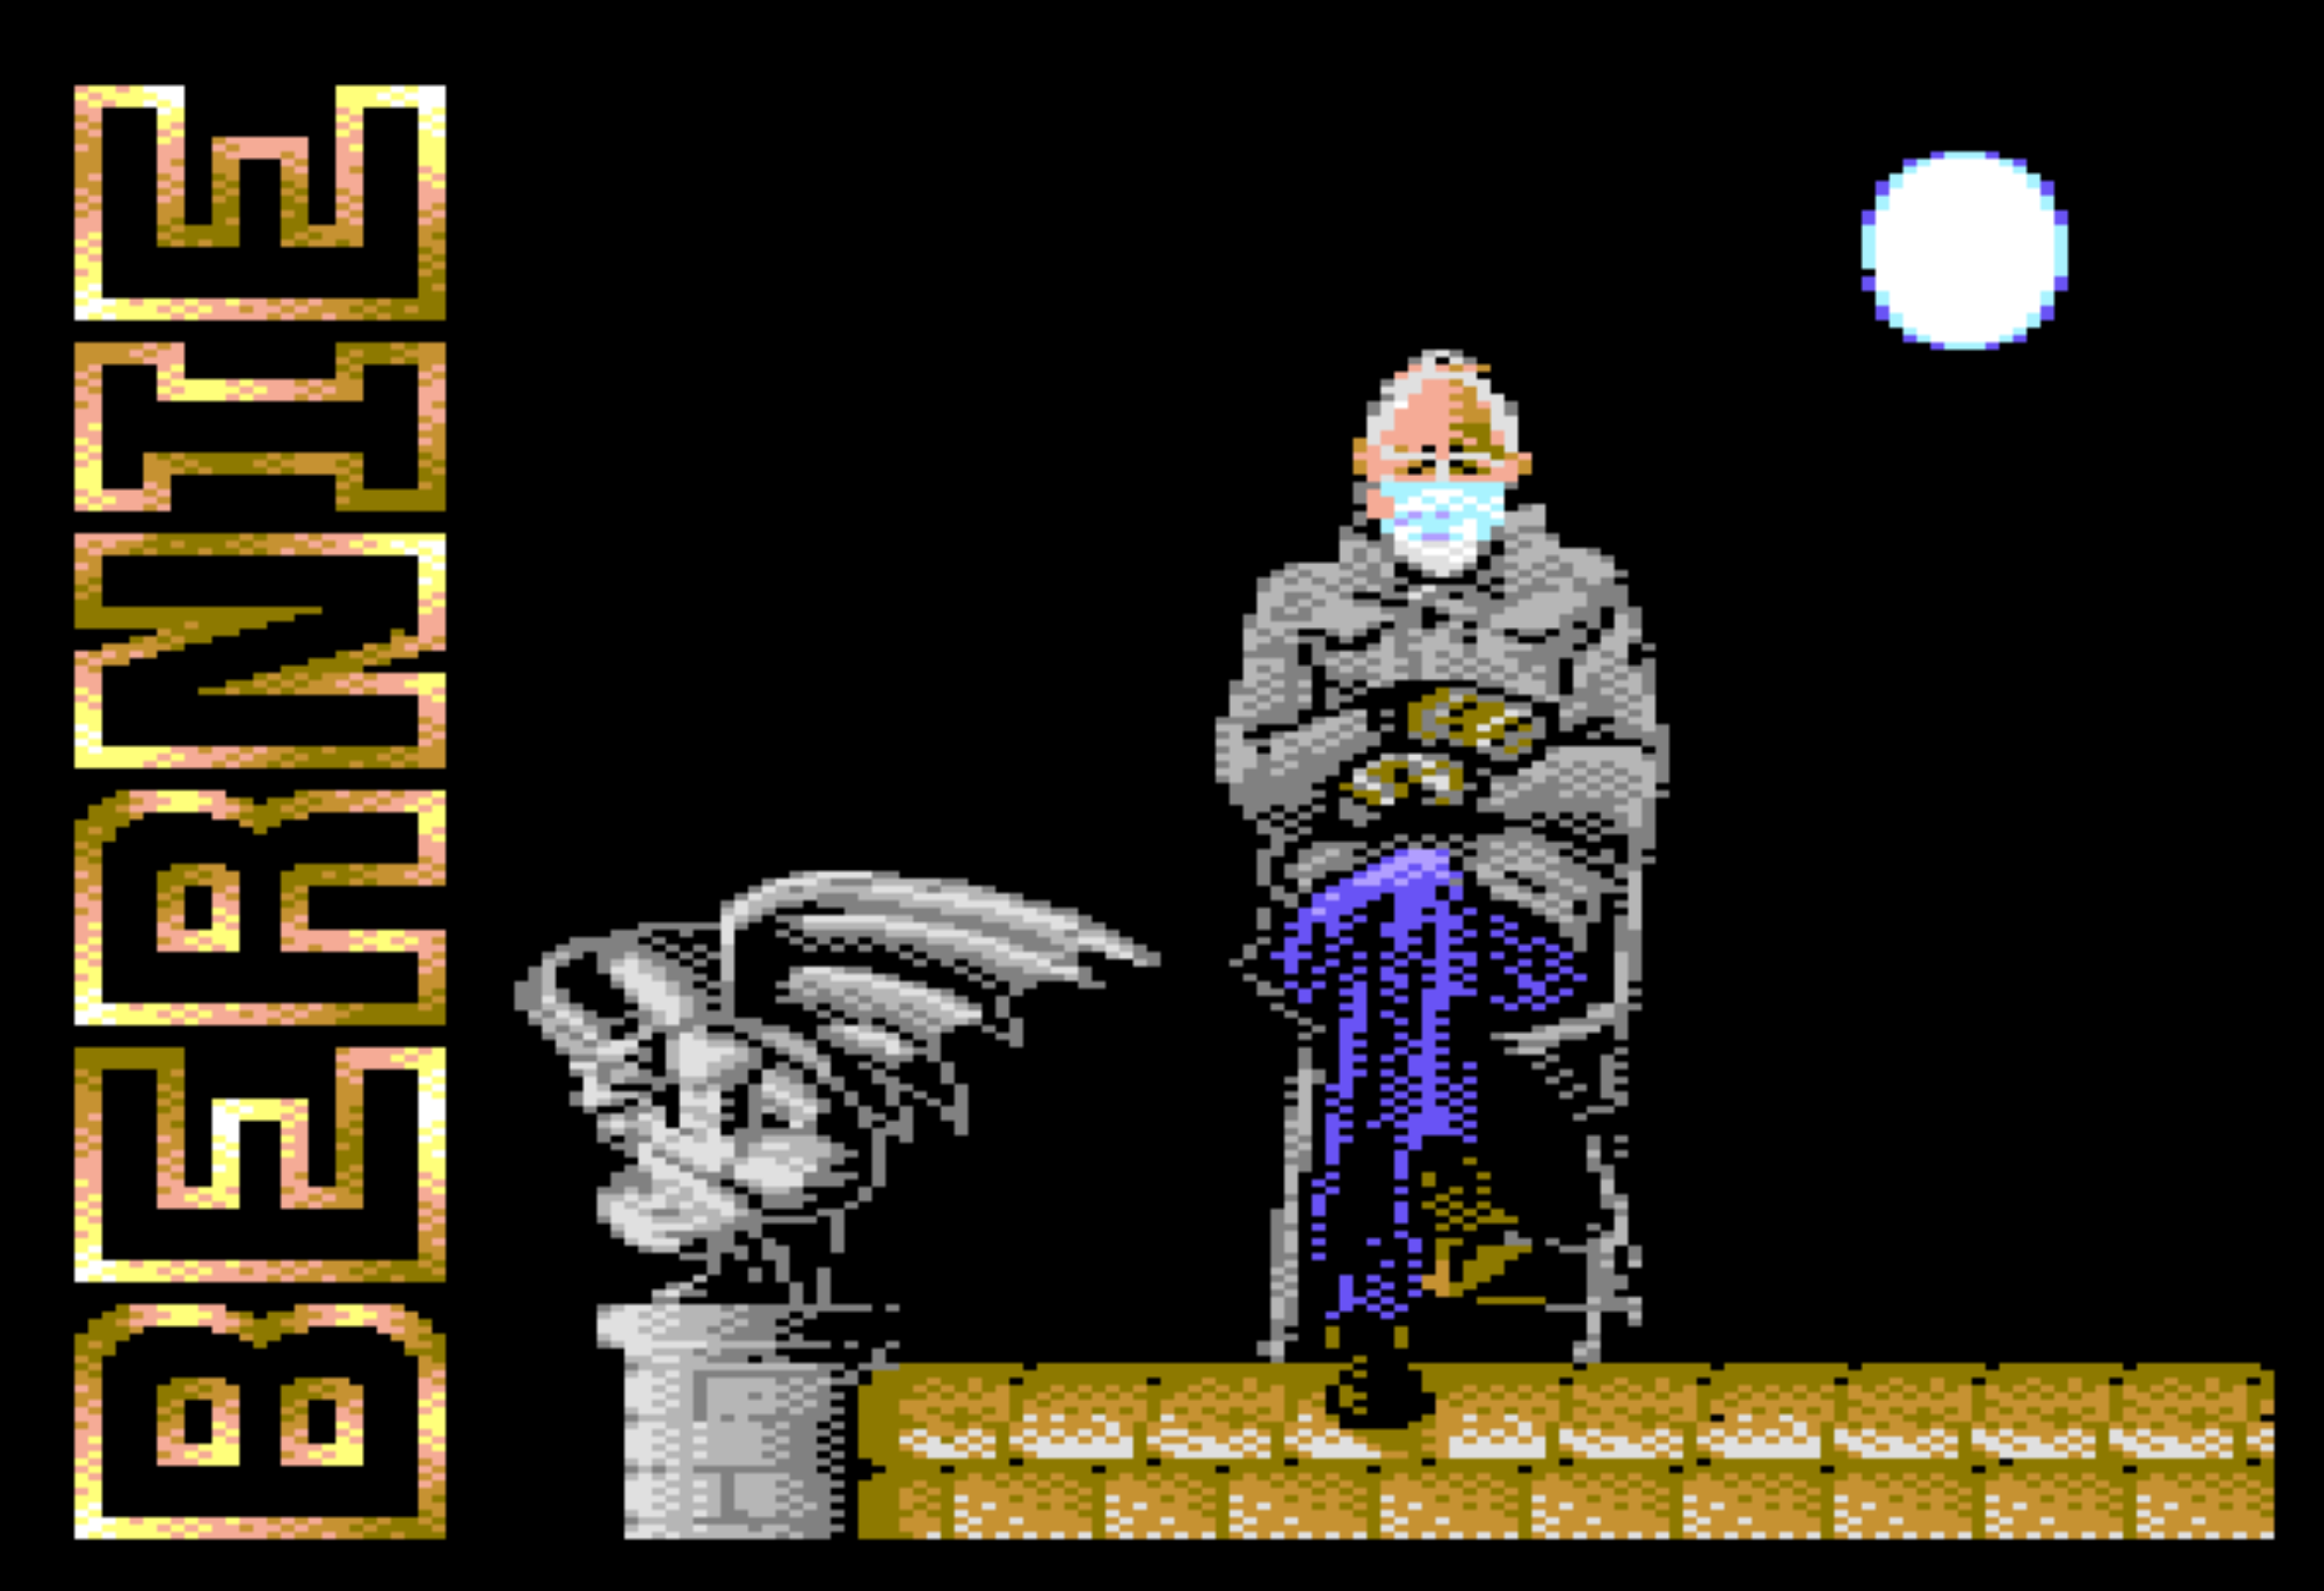
Bernie Sanders and Donald Trump have been added to a C64 demo called Berniemania by the talented Pretzel Logic. Even includes the knitted mittens!

Older readers may recognise the setting for the demo looks very like the classic Batmania by the same group. Nice bit of work reworking an instantly recognisable demo!
BXS-HD1 True Wireless Stereo Earphones

I don’t know much about audio, and my hearing has been damaged by too many noisy nightclubs in my twenties but I do listen to a lot of podcasts using earphones.
In the past I preferred to use wired Apple earpods and I still use them. I bought Urban 1 wireless earphones back in September but then I remembered why I hate those earphones that stick deep into your ear. They’re never comfortable. My ears got sore, and they would always fall out with the slightest movement if I wasn’t wearing a hat against the cold.
So, last November I read about the BXS-HD1 True Wireless Stereo Earphones from Onesonic. There were glowing reviews from Irish tech journalists, and similar reviews by people on Twitter. At €59.99 they’re not too expensive either.
I must say I’m very happy with them. Podcast audio is crystal clear. Music is too. They’re reasonably good at dealing with bass.
They sync with my Galaxy S9+ when I lift them out of the case. Double tap pauses the audio usually, though sometimes that gets temperamental and I need to unlock my phone to pause. Volume controls (single tap) worked fine.
I wasn’t too impressed with the microphone. I tried it twice. Once while out for a walk on a cold morning. The hat I wore rubbed against the earphones and the other party could barely hear what I was saying. Back in my office on a Zoom call my team reported my voice sounded low.
Besides that I recommend them. They’re shipped from Ireland so if you’re in the EU you won’t have to worry about extra customs fees due to Brexit.
(This is not a paid review, I’m just happy with my purchase.)
Your mouse is too small
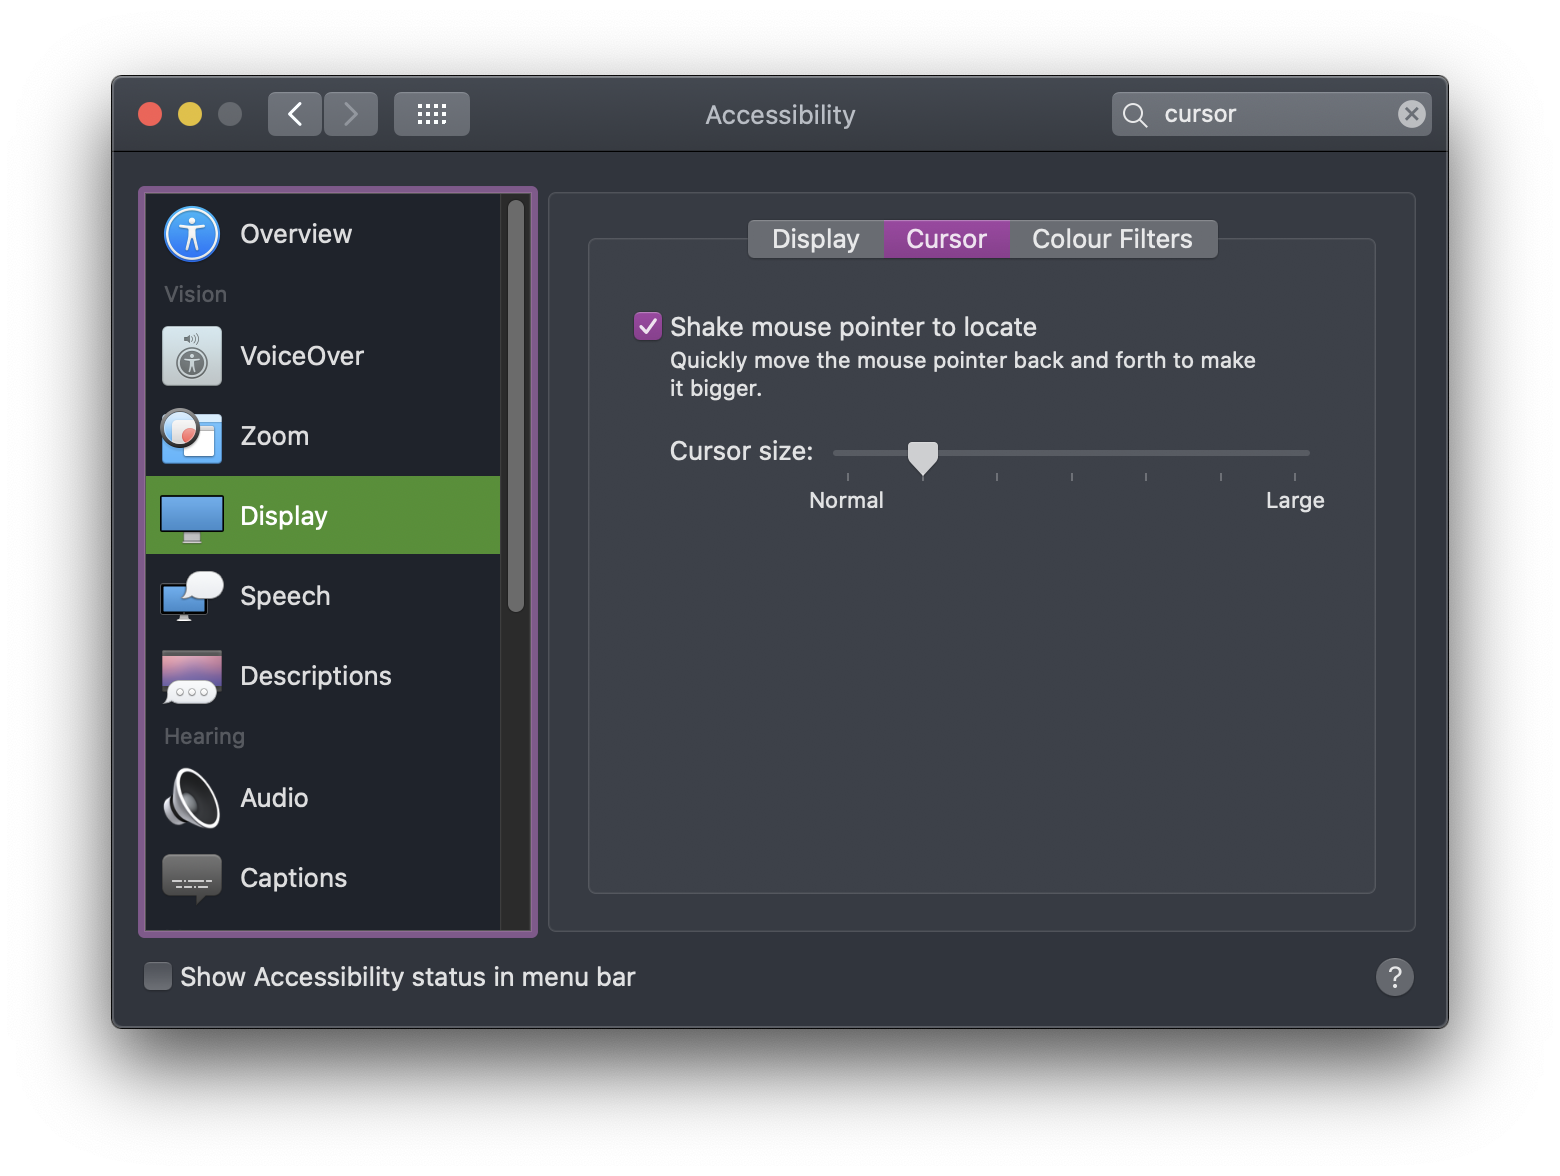
Prompted by someone sharing this tweet at work I decided to try making the mouse cursor on my machine bigger.
On a Mac go to System Preferences->Accessibility->Display->Cursor.
I only bumped the size up one notch, but it’s made a nice change and really makes a difference to the “feel” of the mouse cursor when hovering over text containing links.
After doing that I wondered what else I could do. I left the display at it’s default resolution but in Firefox I did increase the minimum font size, and that has made some websites more pleasant to use.
My son uses a 15.6″ laptop screen with tiny fonts I can barely read when I’m sitting at his desk. I know I used to do that too in my twenties on a Linux desktop using Netscape Navigator but times change and my eyes change. This blog has been going more than twenty years. I wonder what accessibility features I’ll be writing about in another twenty years, eh?
The Office Matrix
Fan of the US Office? Check!
Fan of the Matrix movies? Check!
Here’s a never-before-seen cold open from the US Office that was only released on January 1st 2021!