
Lightroom Classic (LrC) is fantastic for organizing large photo catalogs… but one longstanding limitation has frustrated many people: you cannot sync Smart Collections directly to Adobe’s cloud ecosystem (Lightroom CC for mobile/web). Only regular collections can be synced.
To work around this, plugins like Any Source have already implemented clever solutions but I wanted something that fit my own workflow better. That’s why I created the LrC Smart Collection Sync plugin to mirror smart collections into regular collections for syncing, with a few improvements I needed myself.
Lightroom Classic won’t let you sync Smart Collections directly, so:
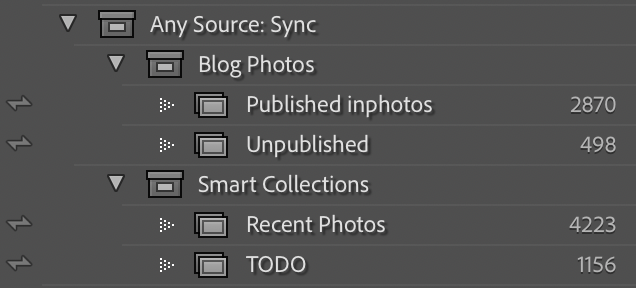
- This plugin automatically mirrors selected smart collections as regular collections.
- Those mirror collections can then be synced through Lightroom Classic’s built-in sync to mobile/web/cloud.
The Any Source plugin does that too, but my plugin also:
- Lets you set the interval when background syncing occurs, from 10 seconds to 300. This is how often mirroring of smart collections with normal collections happens, not syncing with the Adobe Cloud.
- Automatically pause sync while editing (so it doesn’t interrupt your workflow)
All this makes syncing smart collections more streamlined and controllable.
Back in 2020 I posted here about using Any Source, and I’ve been using it ever since, but I never used any of the other features of that fine software and I wondered if it would be difficult to write my own mirroring plugin with the help of Claude Code that is.
The result is a new, simpler plugin. It’s also open source if that matters to you.
Install
Installation is easy enough:
- Clone or download the plugin by clicking on the CODE button and clicking the “Download ZIP” link.
- Place
lrc-smart-collection-sync.lrpluginin your Lightroom or Pictures directory. - Add it through File → Plug-in Manager in LrC.
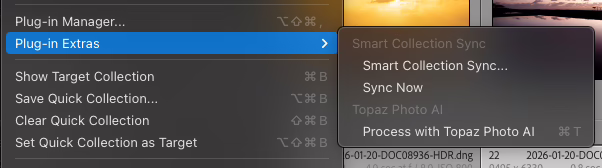
When enabled, it will add 2 new menus to Plug-in Extras:
- Smart Collection Sync…
- Sync Now
Usage
- Go to File > Plug-in Extras > Smart Collection Sync…
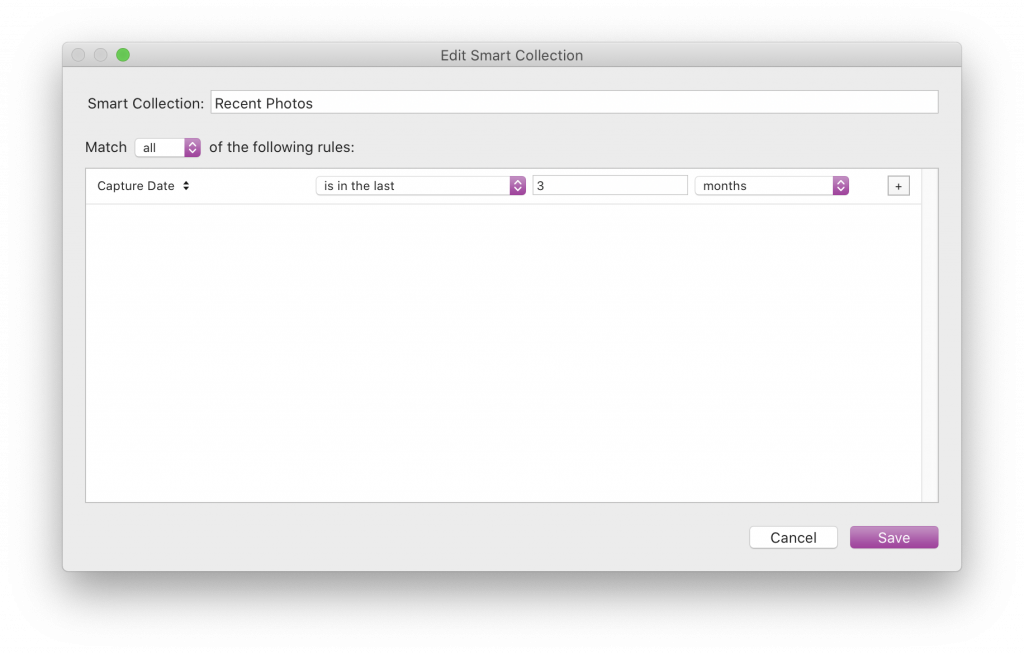
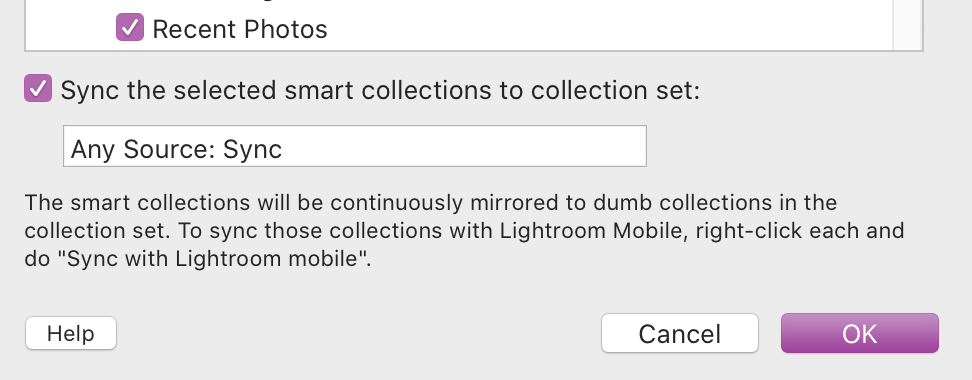
- Select the smart collections you want to mirror
- Set your sync interval
- Enable auto sync or run a manual sync
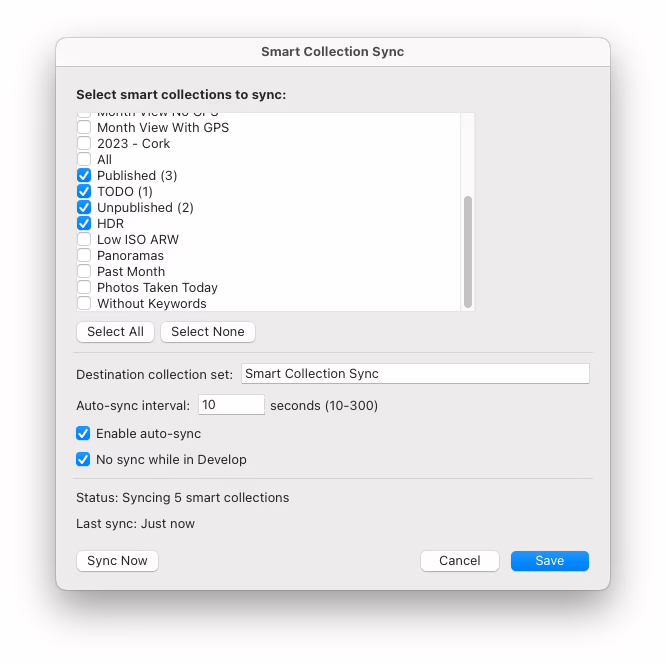
Check “No sync while in Develop” to disable syncing while you’re working on a photo. I noticed while editing photos that Any Source would sometimes sync, and the syncing action became part of the undo which was annoying.
Once the collections are created, tell LrC to sync them with the Adobe Cloud. You can now edit them in Lightroom.
This is the first release of the plugin. It seems to work ok for me. If it takes a while for the configuration window to appear, optimize your Lightroom Catalogue. That really helped me. I guarantee nothing except that this will take up space on your computer!
I don’t have any “new release” checks added but I’ll post here about major changes, or you can watch the GitHub repository to get updates.
PS. The Any Source plugin is really a great plugin with many more features. If you use Lightroom Classic you’ll probably find something in there that will be useful.


