
Geotagging your photos means adding location data to the image so they can be displayed on a map. Be aware that doing so might reveal sensitive information you’d rather keep secret like your home address.
You can of course remove location data when you export images, like I did with the images in this post.
Anyway, here is how I geotag my photos.
For photos I’ve already taken, I use Google Timeline and export it from my Google account using Google Takeout. You’ll get a rather large “Recent.json” file out of that. To convert that file into the GPX format usable by Lightroom Classic, use this Python script which I’ve already covered in this post.
When I go out with my camera now I use the Anrdoid app, OpenTracks. It’s a free app you can grab from f-droid, but there’s also a paid version on the Google Play Store if you want to support the developer. You can also use GPSLogger, a free app that has the advantage of being able to save your .gpx files to Dropbox or Google Drive.
On iOS, the myTracks app appears to do a similar job but I can’t test it. Please comment if you have tried it or know of decent alternatives.
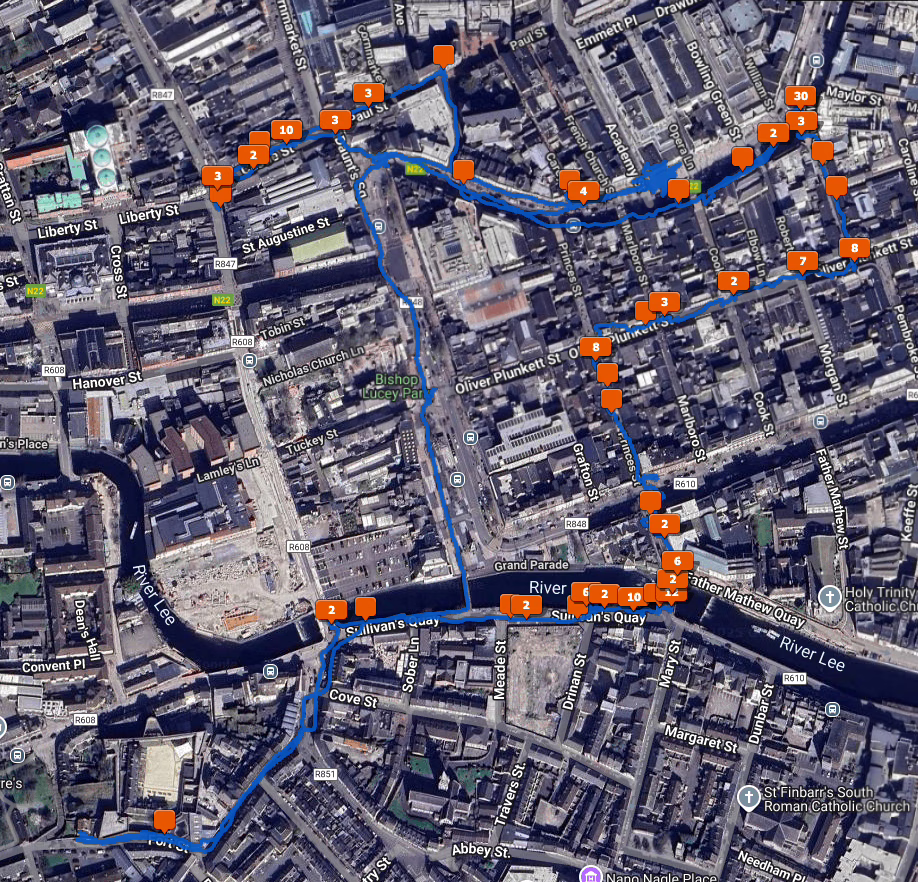
To geotag your photos in Lightroom Classic, the Adobe documentation on the subject is excellent. Once you’ve opened the Map Module and done it once it’s easy to do again. When you geotag your photos, the Map Module will look like this.
There is also Jeffrey’s “Geoencoding Support” Plugin for Lightroom that I’ve used for years but maybe it’s because of changes to LrC in recent years, it’s gotten really slow for me. I usually use the built in LrC functionality in the Maps module now.